Zapier... Sounds a bit techy, I know.
In this article, we will explain exactly what it is and how you can use it to connect your EnquiryBot and send the enquiry data to another software or platform that your business uses.
Please note: To use the webhook feature of Zapier, you will need to a paid Zapier account. Account starts start from £22 per month which would be sufficient for most volume use cases. For more on pricing and to sign up visit https://zapier.com/pricing
What is Zapier
Imagine you have a piece of garden hose and you cut it in half. To connect it back together you would need some sort of connector to join the two ends to connect them.
That's what Zapier is. It's a platform that allows you to connect one software to another.

How does it work
This gets a little technical, so bear with us here...
Our Zapier integration works by using a zapier webhook. The webhook is used to catch data from one system and send and map it to another system.
In the next section, we will show you a practical example of connecting EnquiryBot to another platform.

There are a few simple steps to set up this connection.
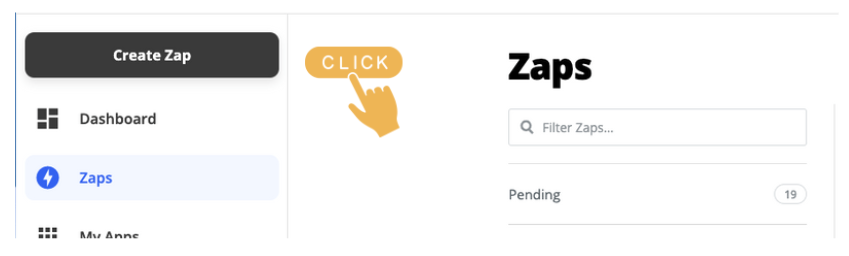
Step 1. Create a Zapier account and login. Then click create zap.
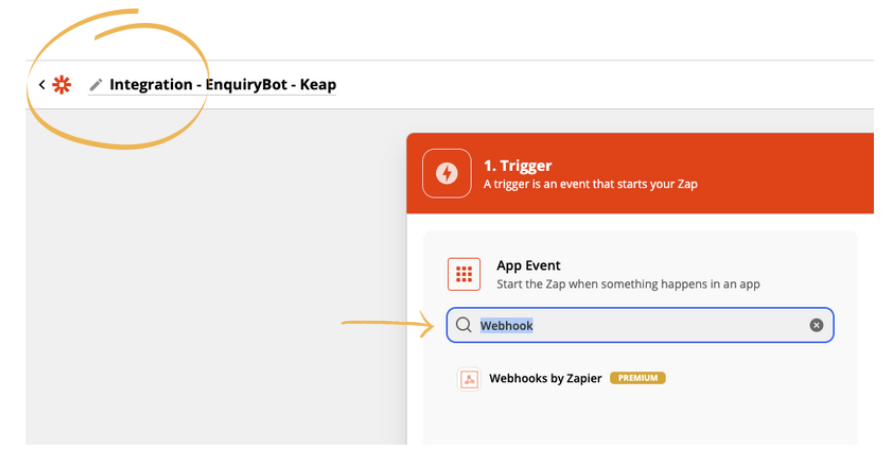
Step 2. Give your Zap a name. In this example, we are going to integrate with a CRM software called Keap so we will call the integration "Integration - EnquiryBot - Keap"
In the app event box search Webhook and select when found.
Step 3. In the trigger event dropdown select Catch hook and click continue.

Step 4. Copy your child key from your Enquirybot
Step 5. Now you need to head over to the EnquiryBot platform and log in. Go to the pipeline on the menu on the left-hand side when logged into EnquiryBot and click on it. (if you don't have pipeline as a part of your subscription plan, please contact [email protected] to get this part setup for you)
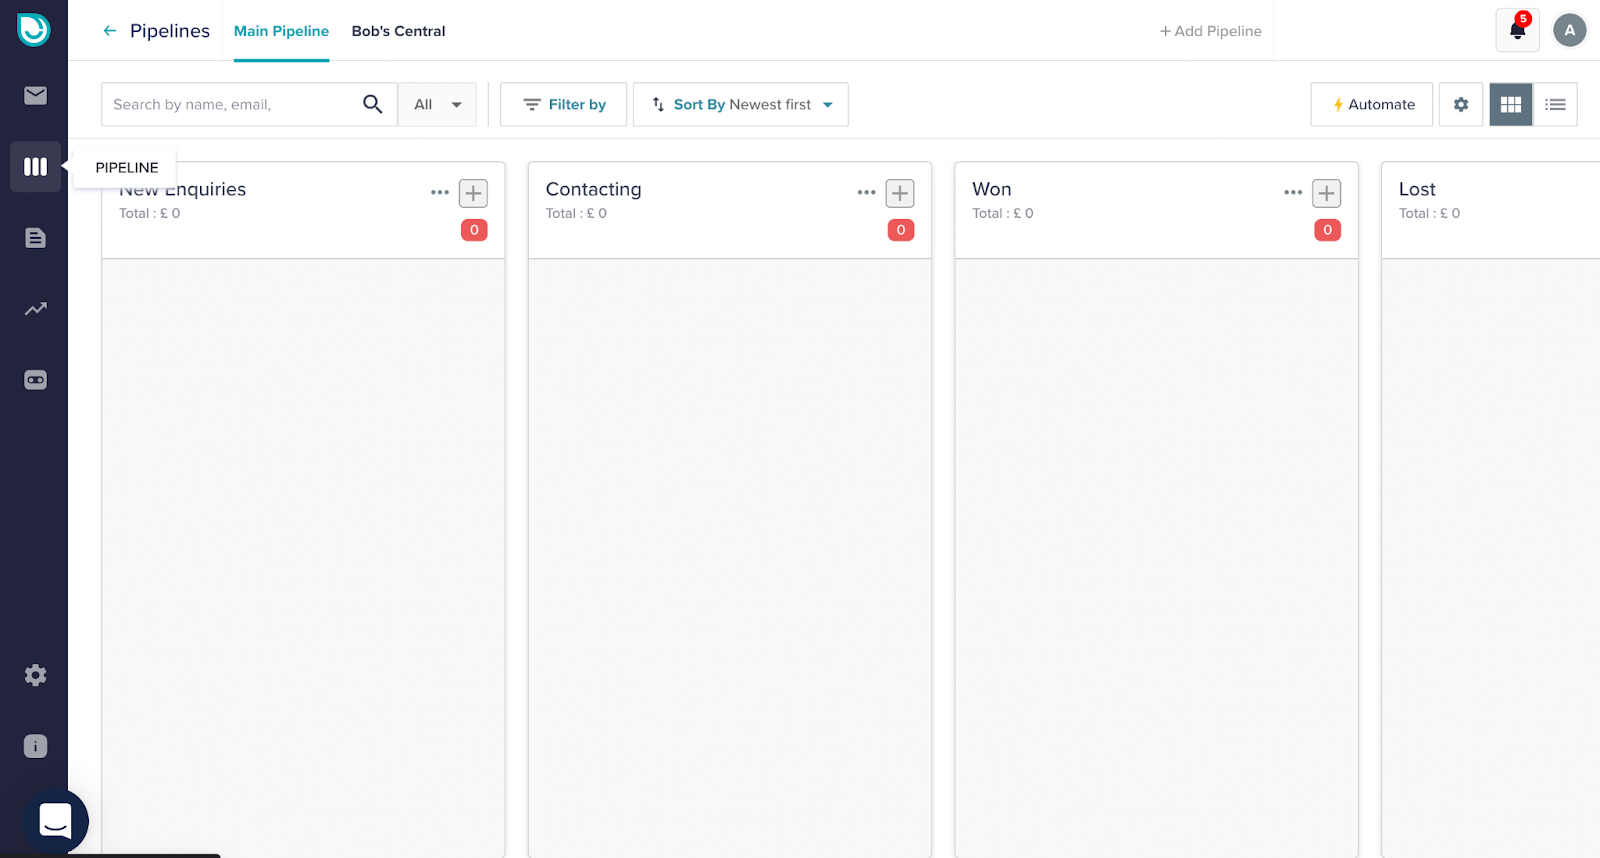
Step 6. Click on the automation icon from the right
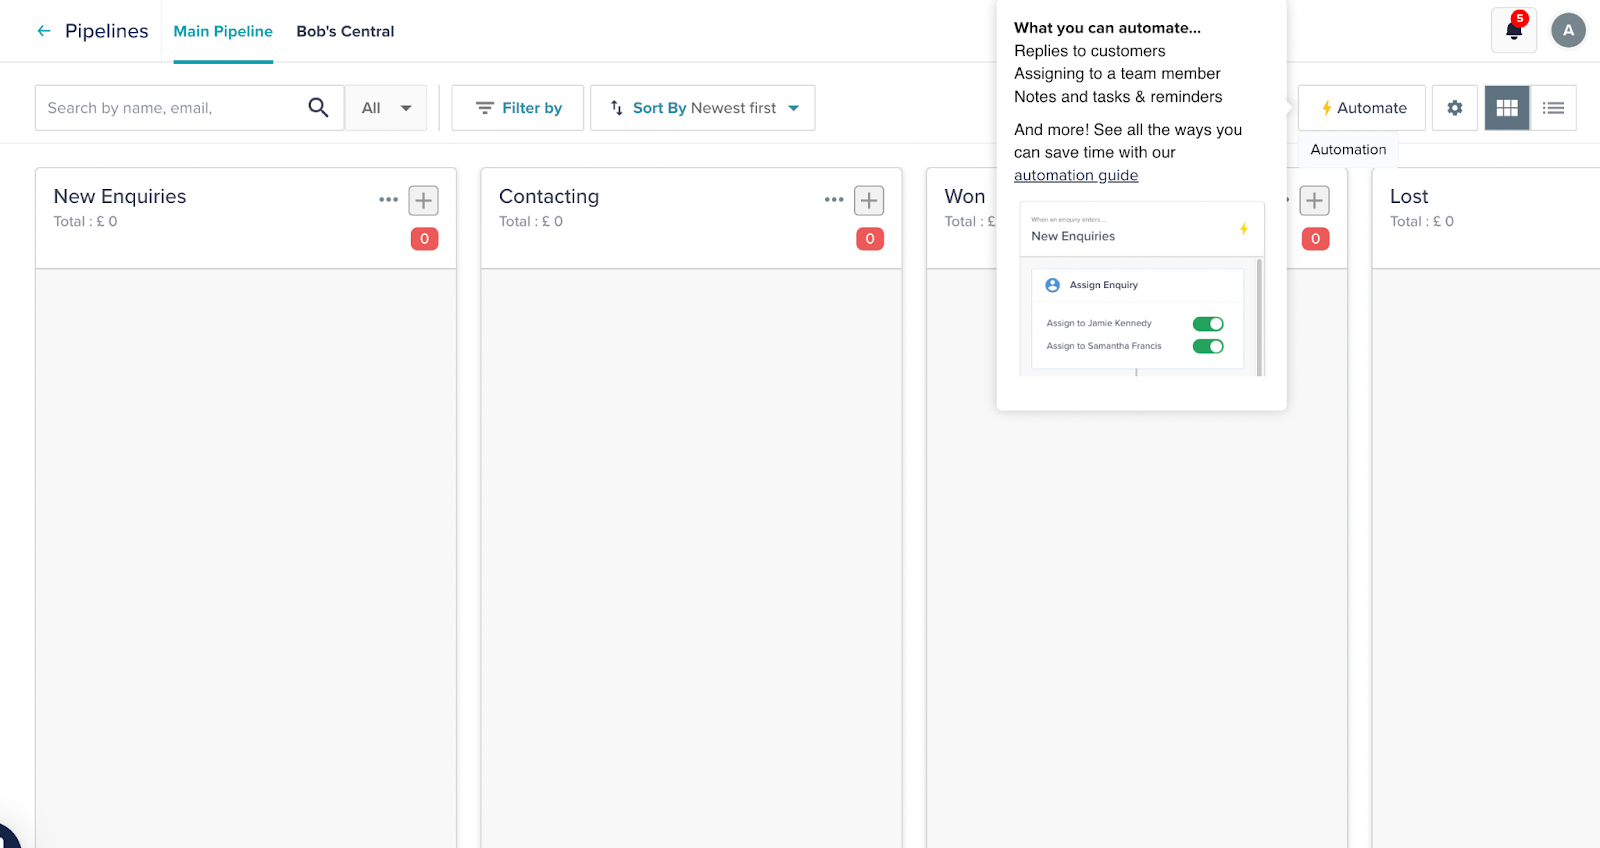
Step 7. On the pipeline stage “New Enquiry”, click on the + Add Automation button.

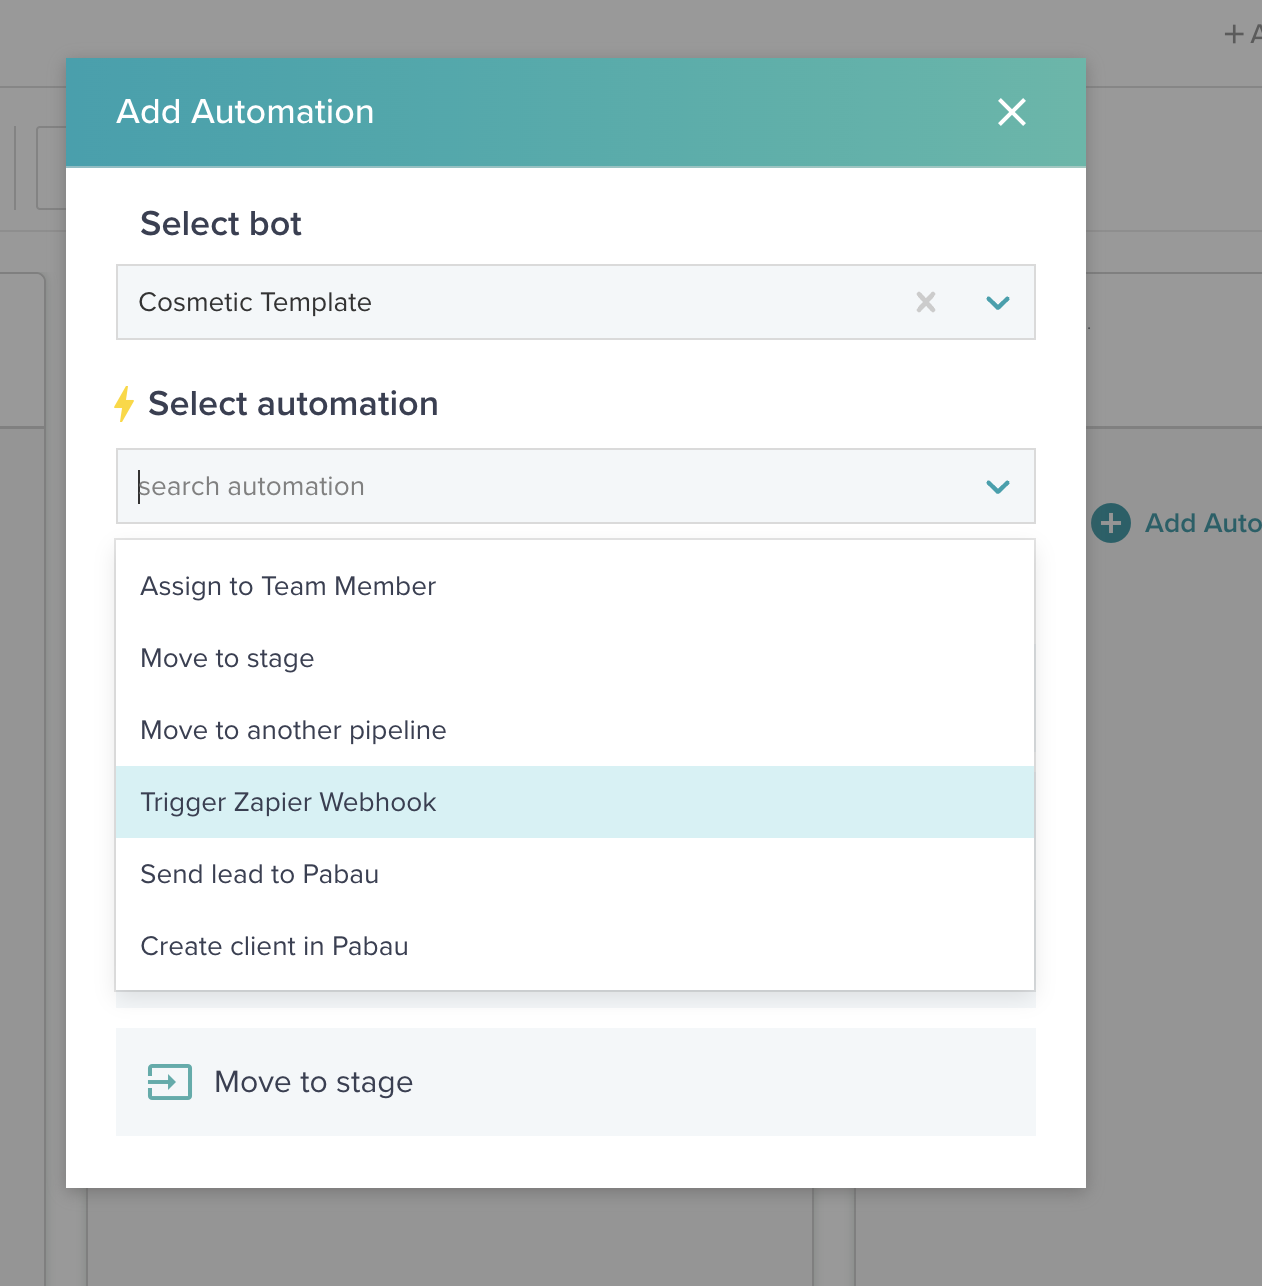
Step 8. Now from the pop-up in the Select automation click on “Trigger Zapier Webhook”
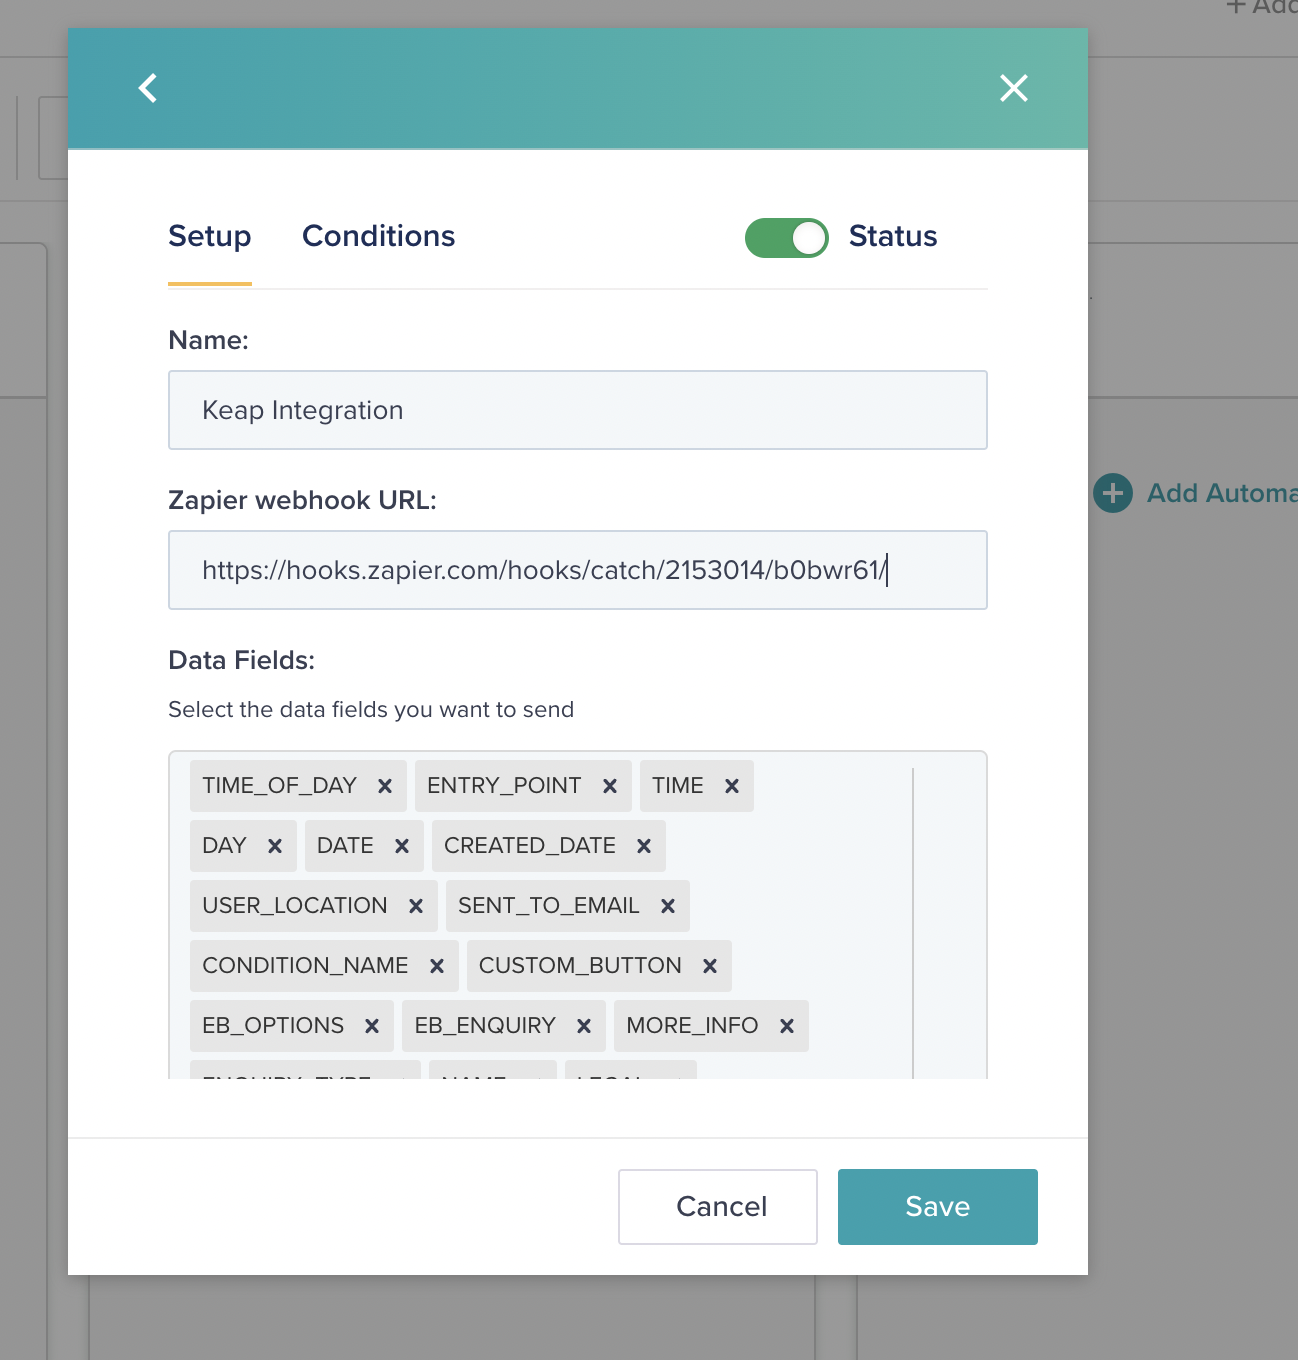
Step 9: Give your Zap a name. In this example, we are going to integrate with a CRM software called Keap so we will call the integration "Keap Integration"

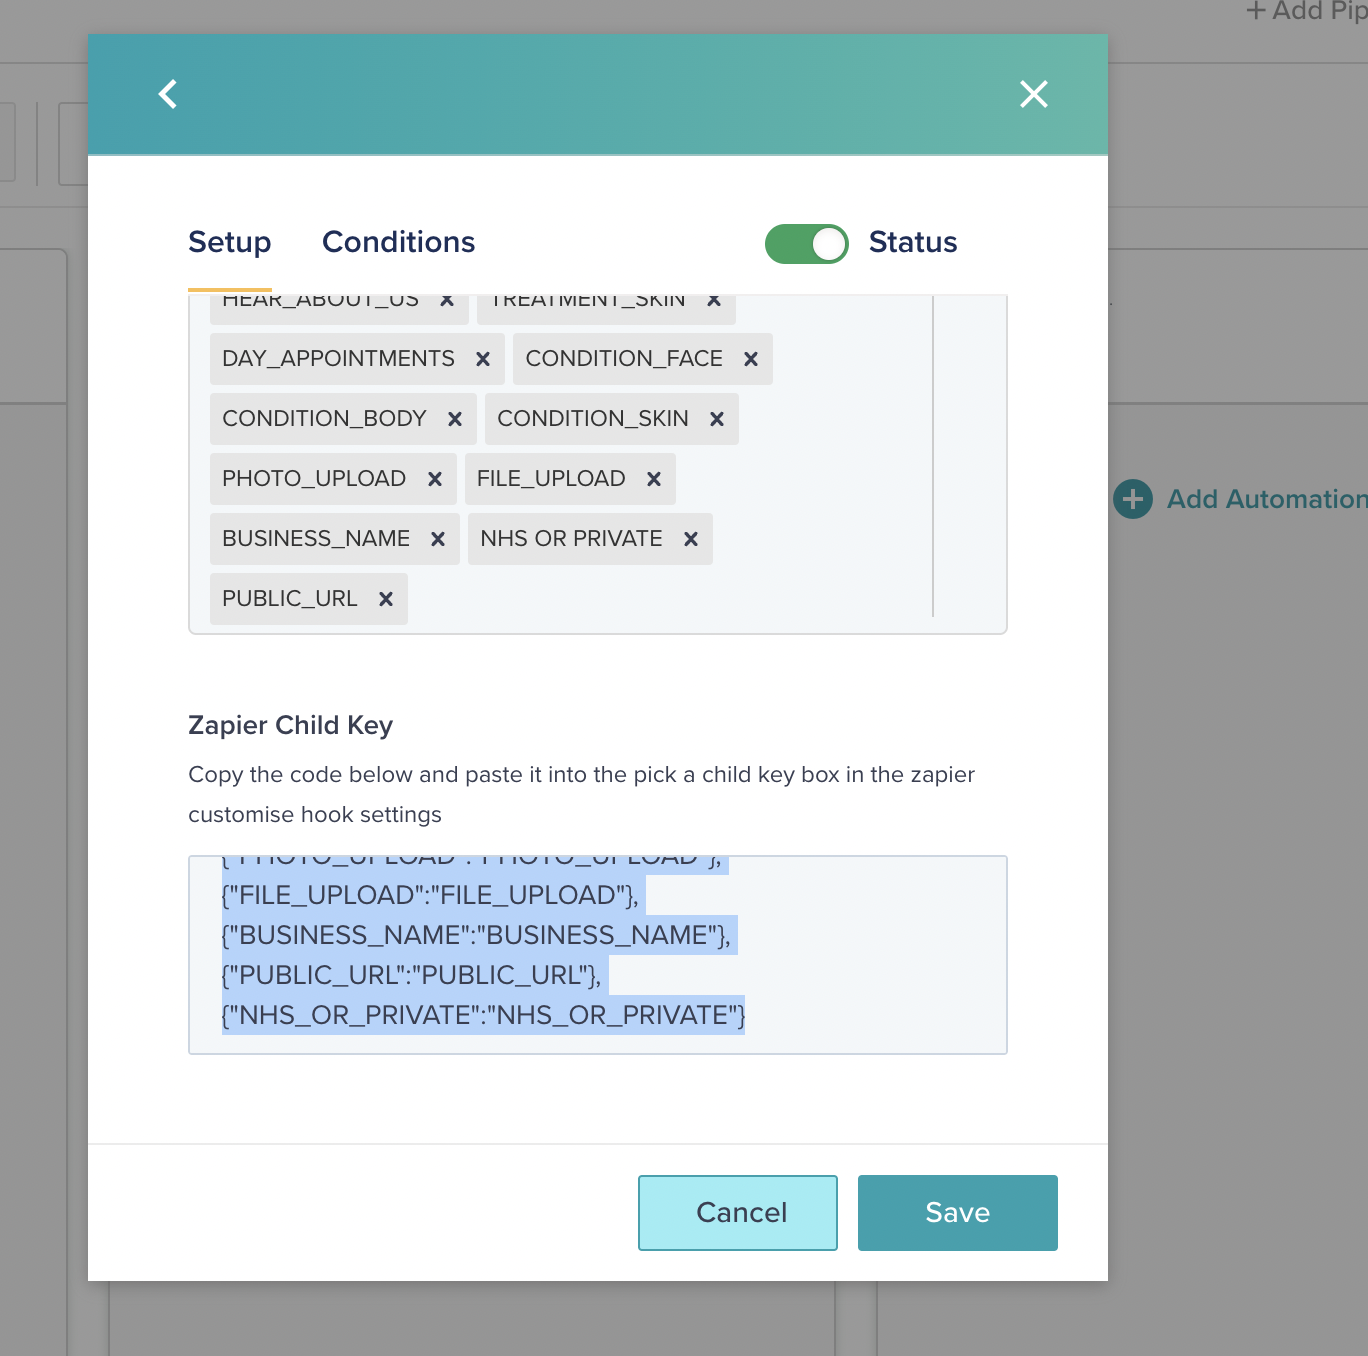
Step 10: Select all the EnquiryBot fields that you want to send through to the connecting software. Once ready, in the Zapier child key box, select all the options and copy them.
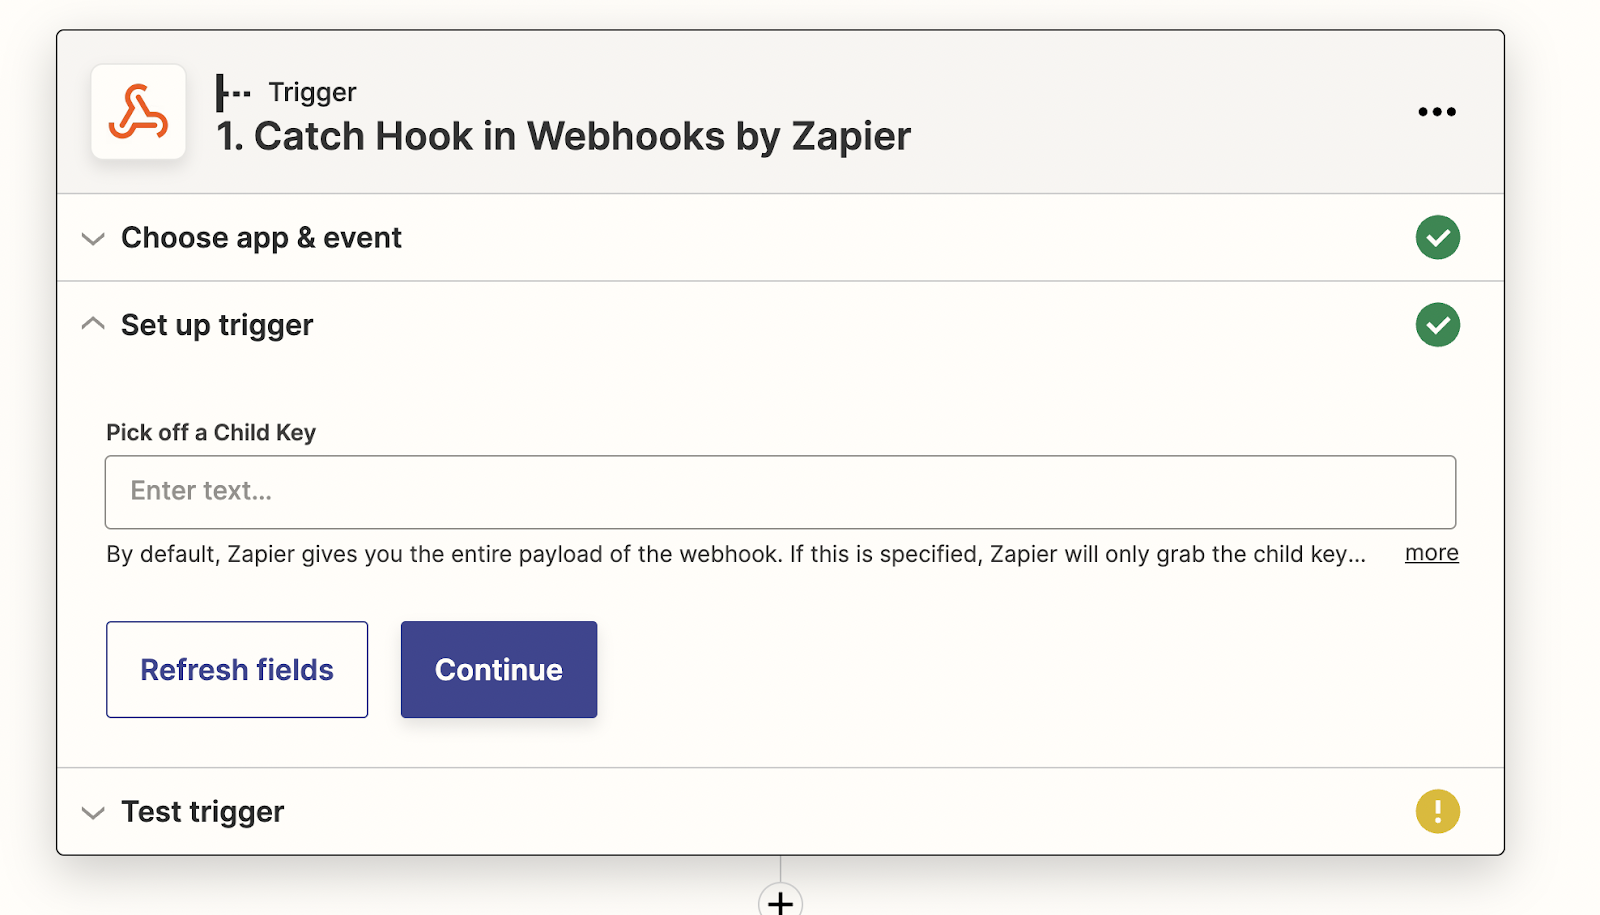
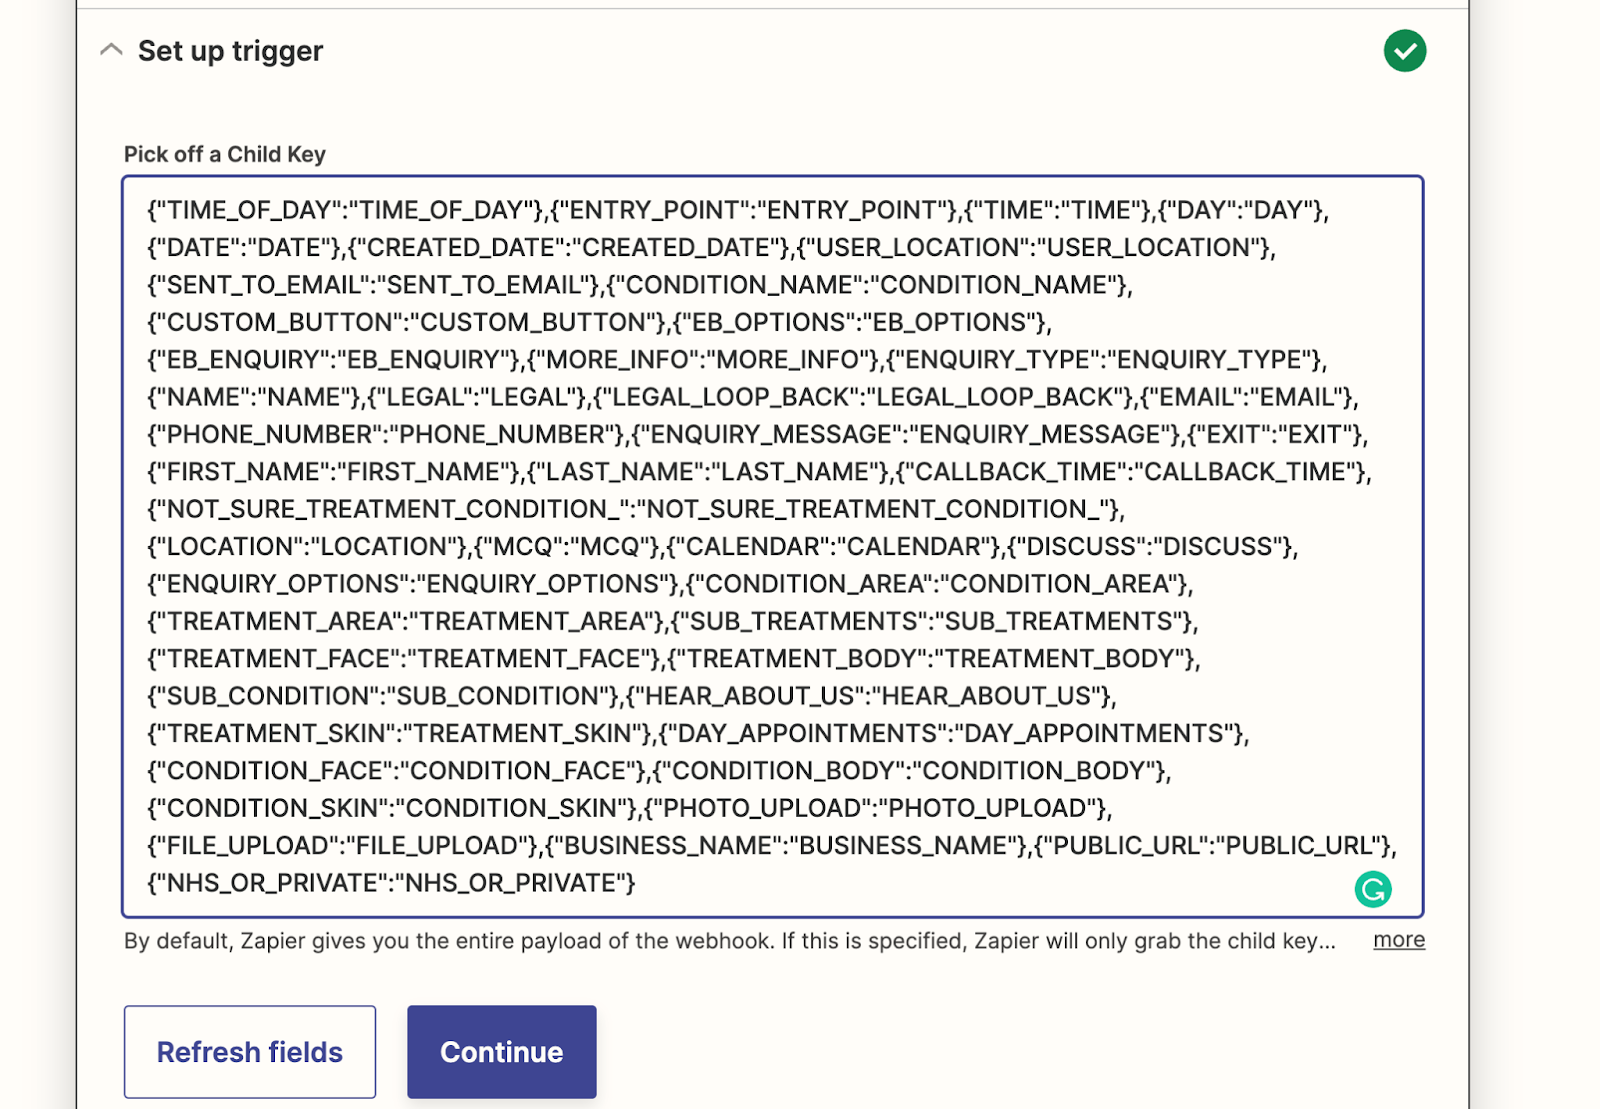
Step 11. Now head back over to Zapier and paste the child key copied from EnquiryBot and click continue.
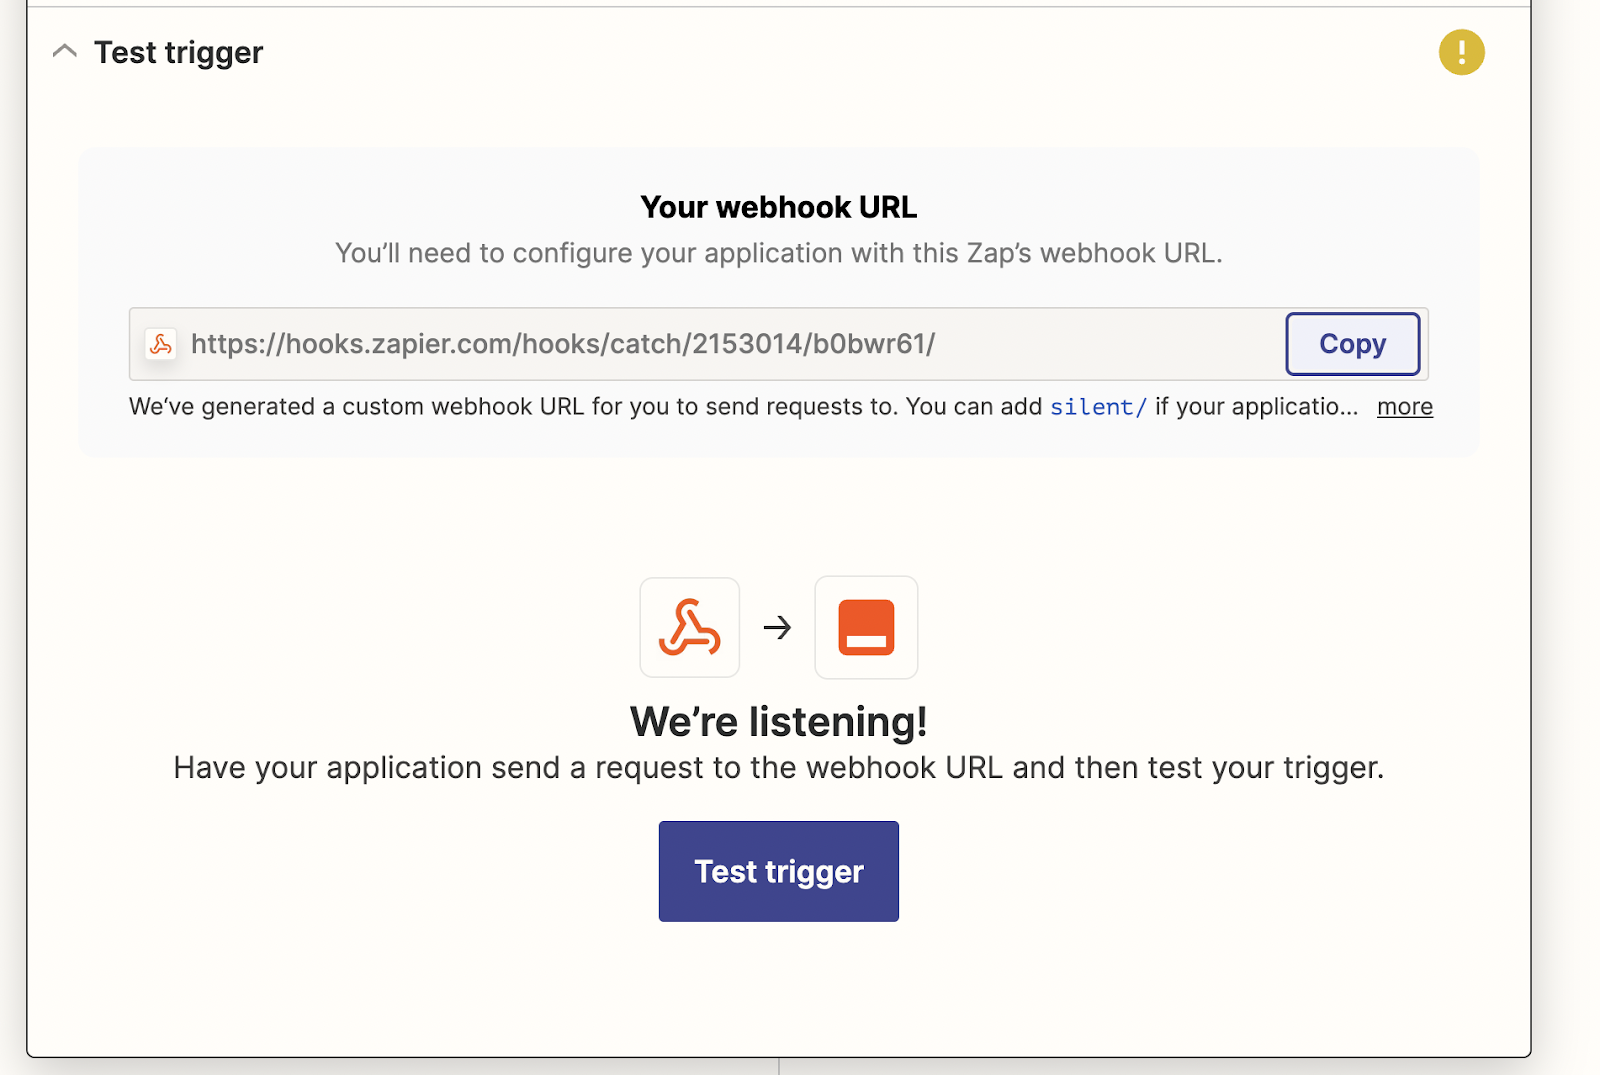
Step: 12 After clicking on the continue button you will see “Your webhook URL”. Head over to Enquirybot and paste it into “Zapier webhook URL” section and press “Save”
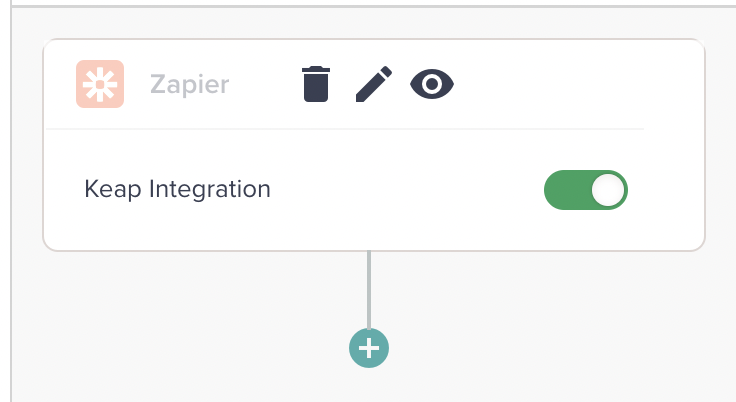
Step: 13 The integration will get added to the “New Enquiry stage”. By default the integration will be turned off, just click on the toggle to turn it “On”
Step 14. Head back to Zapier, Now you are going to need to put a test enquiry through your EnquiryBot on your website. We need to put a live enquiry through to make sure the data comes through.
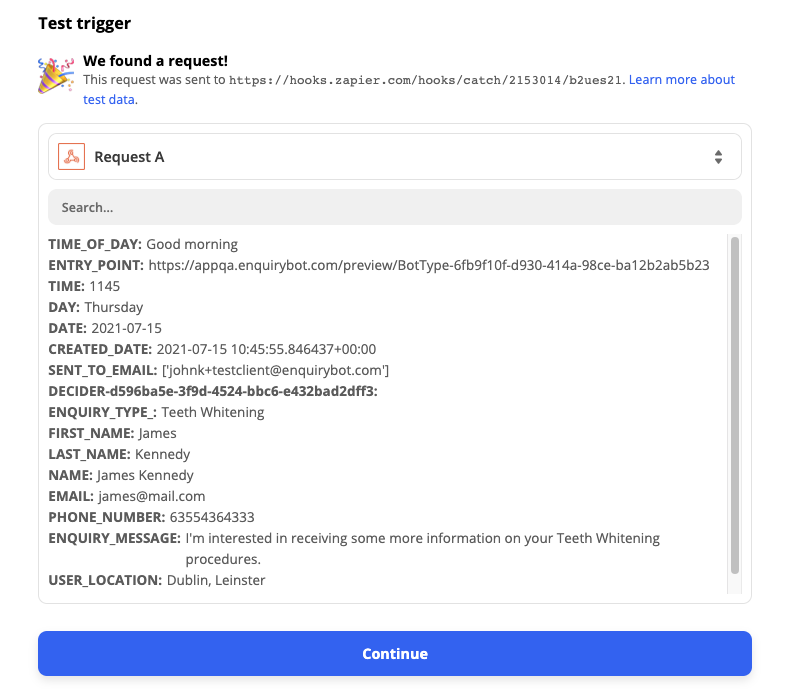
Step 15. Once you have completed the enquiry on your bot, come back to Zapier and click "Test trigger"
When the test is successful, you will then see this on the screen
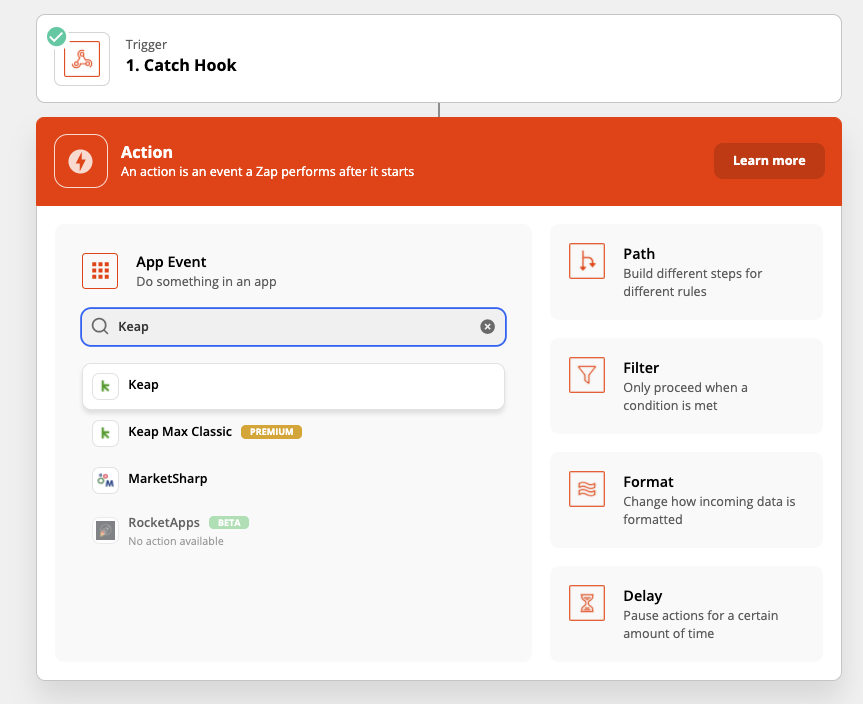
Step 16. Next, you will add a step and search for the software you would like to connect with. In the example below, we will connect with a CRM called Keap.
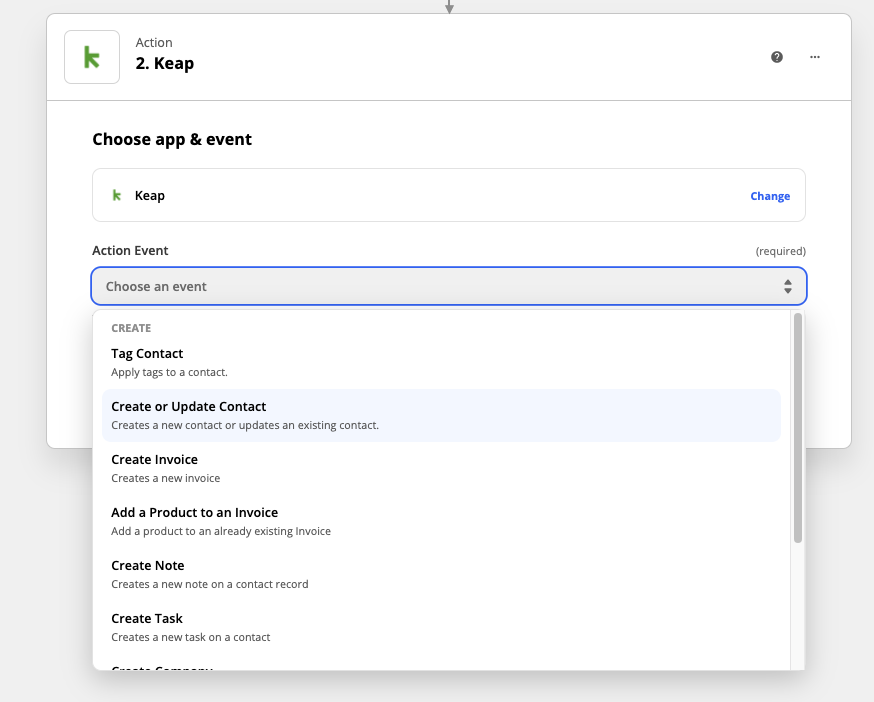
Step 17. Depending on the software you are connecting to there will be a range of action events that you can do. In this example, we want to "Create or update contact"
Select that option and click continue:
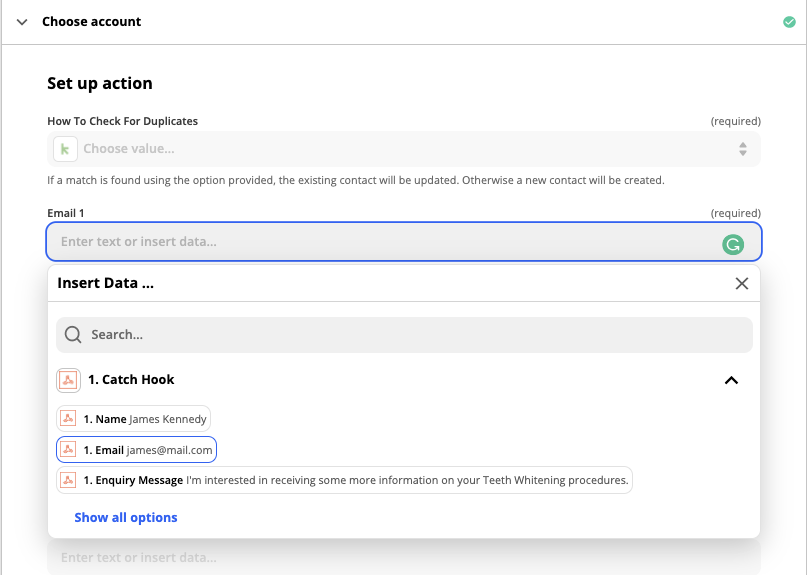
Step 18. Now you will need to match the EnquiryBot fields that have been sent through to the relevant fields in the connected software.
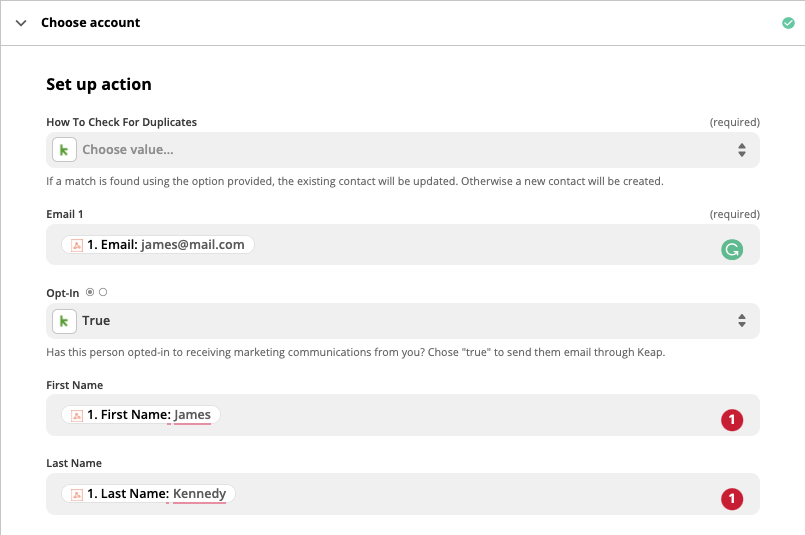
When the fields are mapped and inputted they look like this.
Step 19. Once you have mapped all the fields, click test and continue and then turn on the zap.


And that's it! You're all connected.
Do I need a paid Zapier account to setup a connection
Yes, the Zapier webhook is a premium zap and therefore requires a paid Zapier account.
My data is not coming through to the webhook.
Check to make sure that you have saved the setup in EnquiryBot
Make sure that you have selected the checkboxes for the data that you want to send from EnquiryBot.
Check to see that your zap is turned on
What platforms/software can I connect to?
With Zapier, you can connect to 1000's of other platforms and software. To view a complete list visit - https://zapier.com/apps
If you have any questions, as always you can hop on the live chat support from 9 am - 5 pm Mon-Fri or send us an email at [email protected].
