When setting up your account our bot development team will create a default pipeline for you and send all enquiries in there from your EnquiryBot.
If you want to create another pipeline however and send specific enquiries in there keep reading as it's super simple!
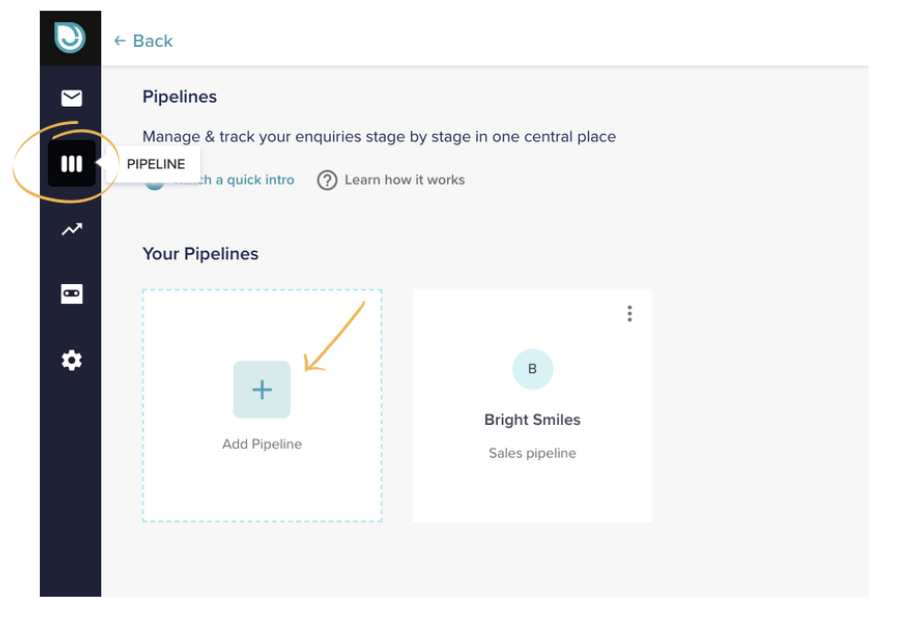
Step 1. Click the + Add pipeline button, you can find this in 2 places. Firstly on your pipeline screen by clicking the icon on the left menu. And secondly on the top right when inside a pipeline.

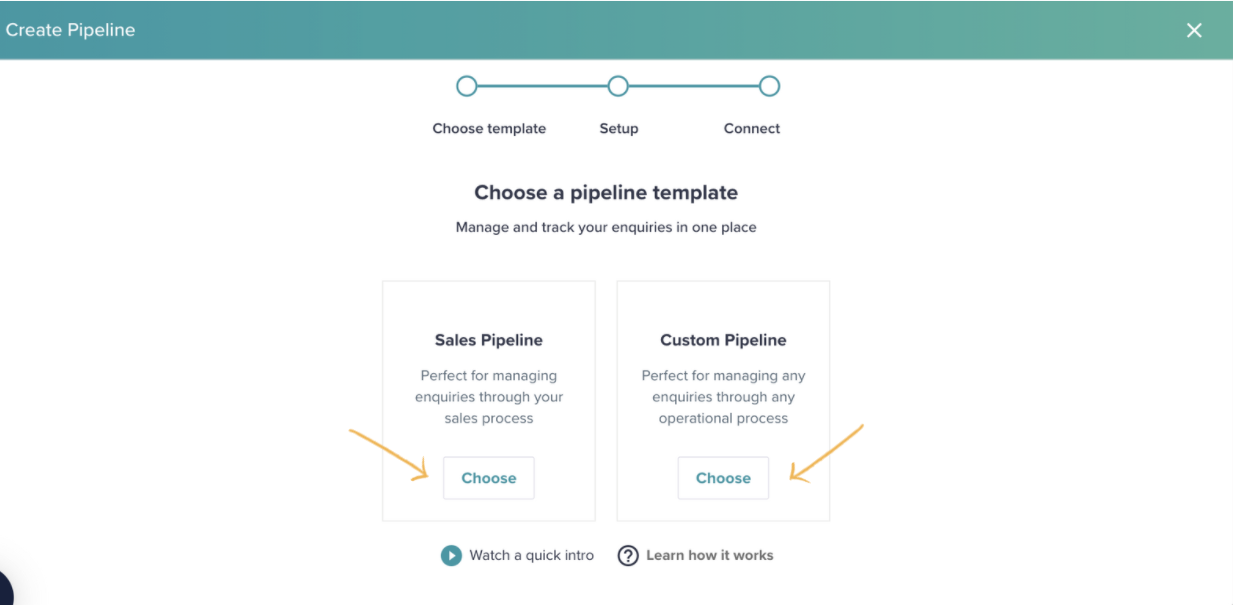
Step 2. On the pop-up, choose a pipeline template. There are 2 options:
Sales Pipeline
Perfect for managing enquiries through your sales process.
Example use case: Dealing with your new sales enquiries
Custom Pipeline
Perfect for managing any enquiries through any operation process
Example use case: Dealing with enquiries once they are converted to a customer. For example, you could create stages in a pipeline once an appointment has been booked.

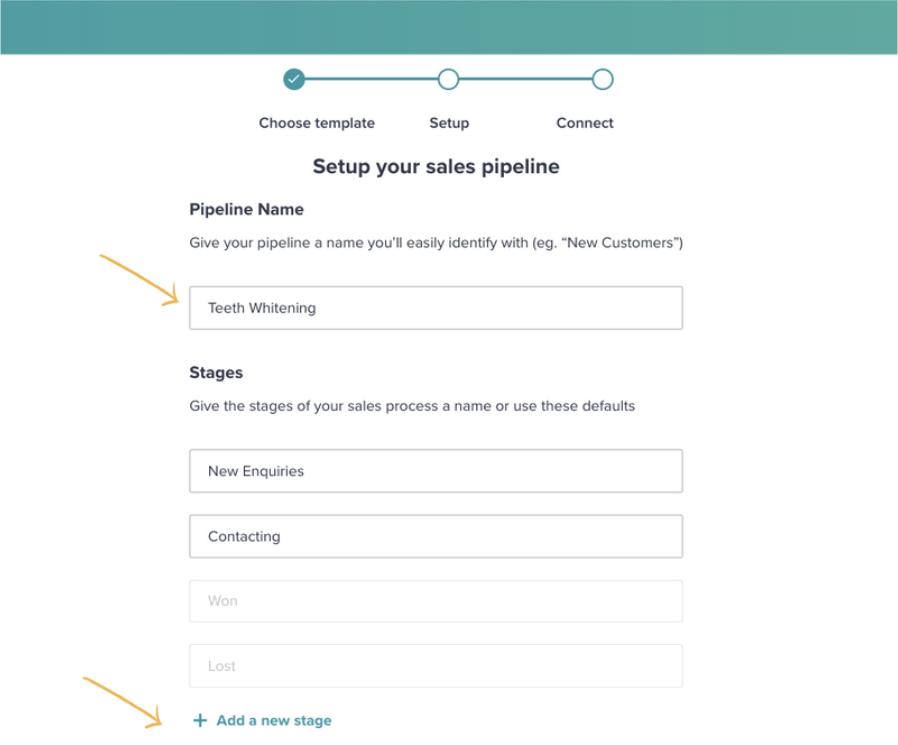
Step 3. Let's take the sales pipeline as a template for this example. Give your pipeline a name. In this example, we'll call it "Teeth Whitening" as we will send all Teeth Whitening enquiries into this pipeline from the EnquiryBot.
By default, we populate the 4 stages below. Won and Lost stage names cannot be changed as they are directly linked to reporting.
If you would like to add another stage, click + Add a new stage and type the name.
If you're not sure, no worries. You can always add the stage later.

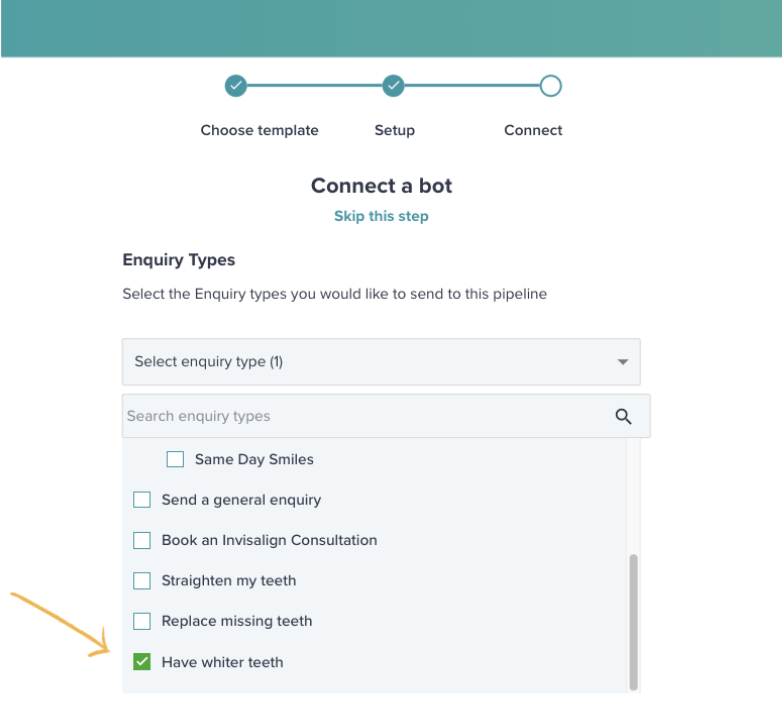
Step 4. If you would like to connect your EnquiryBot to this pipeline so for example that all "Teeth Whitening" enquiries come into this pipeline then simply select the relevant enquiry type and/or sub enquiry type.
In this example, we will select "Have whiter teeth"

Click save and you will be brought directly to your pipeline.
If you want to skip this step you can also do that. Click skip this step. You can always connect a bot to the pipeline afterwards.

Please note: If your EnquiryBot has been running for a while and sending for example "Teeth whitening" enquiries to another pipeline, they will not automatically show in this pipeline. Only NEW Teeth Whitening enquiries will show in this pipeline.
You can move old teeth whitening enquiries to this pipeline, however.