
Please note - this is a PRO account feature.
As a business, you have processes in place to deal with a range of sales and operational tasks.
Each process has a range of steps that are undertaken to ensure the customer has a great experience and that you stay on top of things.
That's why we have developed our Pipeline feature. To help you manage these sales and operational processes & track your enquiries stage by stage in one central place.
In this article we will discuss:
1. What are pipelines and how to use them
A pipeline very simply is a series of stages where your enquiries can be moved between. In the pipeline, each stage represents a stage of your sales or operation process.
For example, a basic sales process for new enquiries could be the following stages.
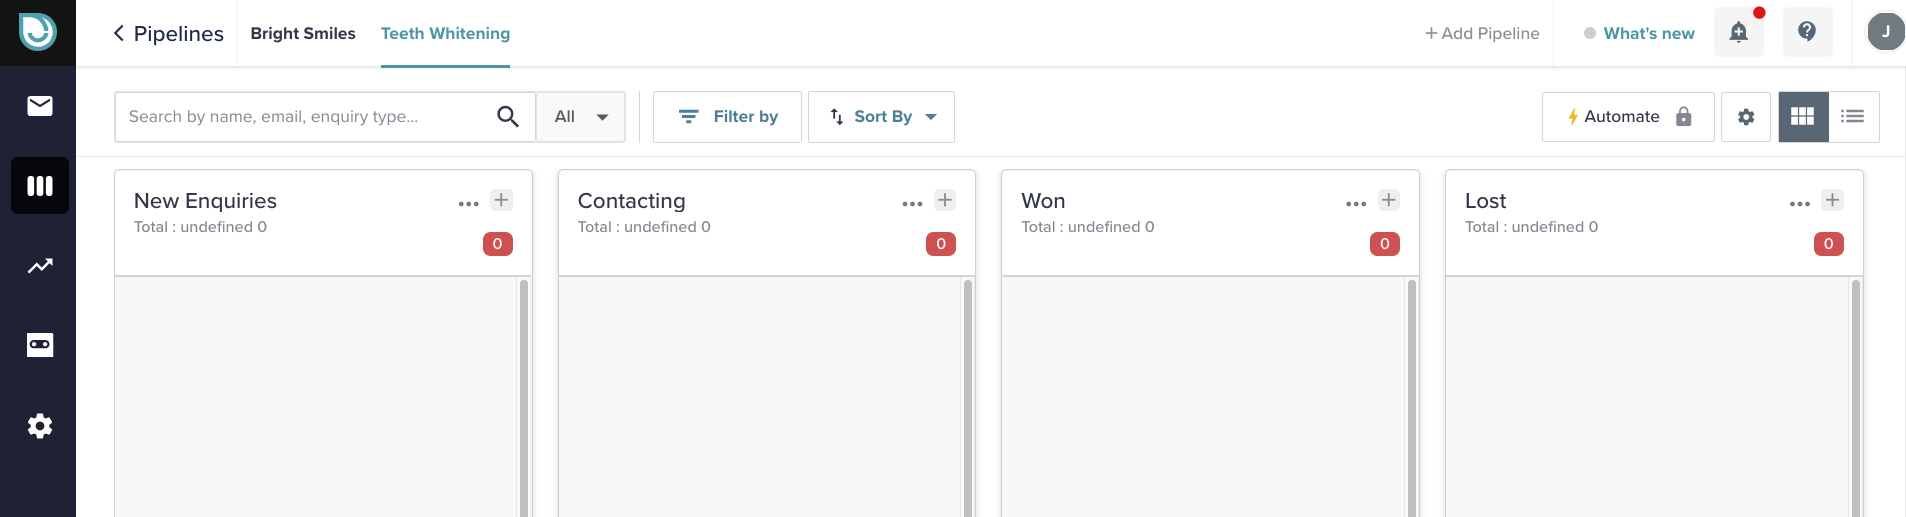
New enquiries, Contacting, Won, Lost
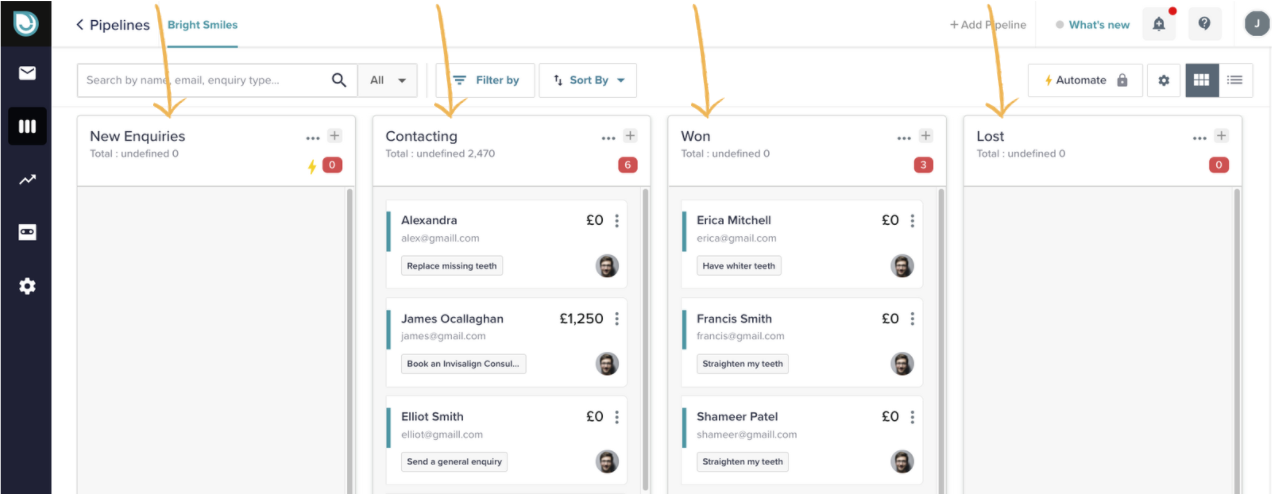
Each new enquiry that comes in from your bot will be sent to your pipeline. Once in the pipeline, you can simply drag the enquiry card to the next stage of your process.
For example, a new enquiry comes in, you send an enquiry to the customer and move the enquiry card to Contacting stage.
You then have another conversation with the customer and you get the sale. You then move the enquiry card to the won stage and add a value to it to keep track of your sales performance.
2. How to create a pipeline
When setting up your account our bot development team will create a default pipeline for you and send all enquiries in there from your EnquiryBot.
If you want to create another pipeline however and send specific enquiries in there keep reading as it's super simple!
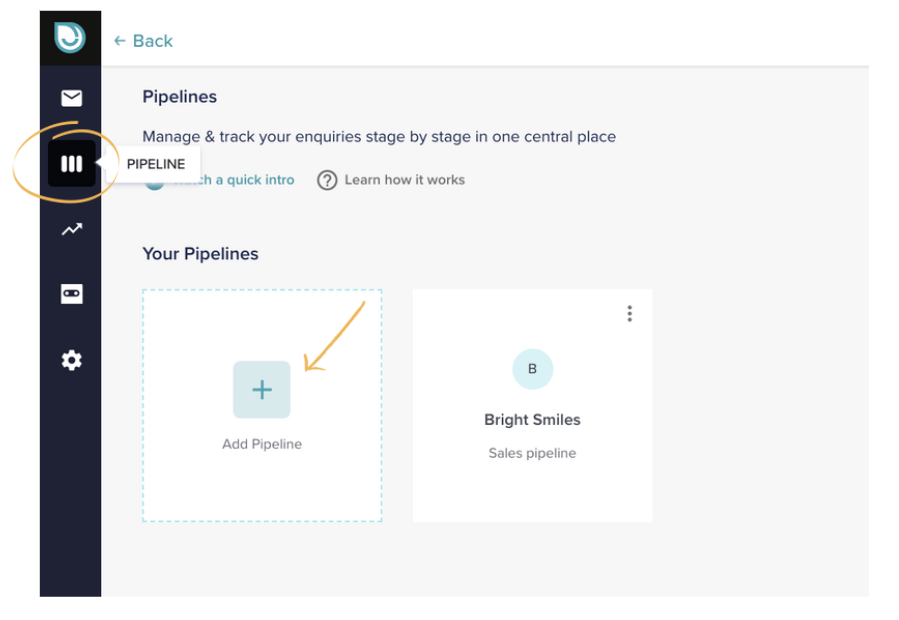
Step 1. Click the + Add pipeline button, you can find this in 2 places. Firstly on your pipeline screen by clicking the icon on the left menu. And secondly on the top right when inside a pipeline.
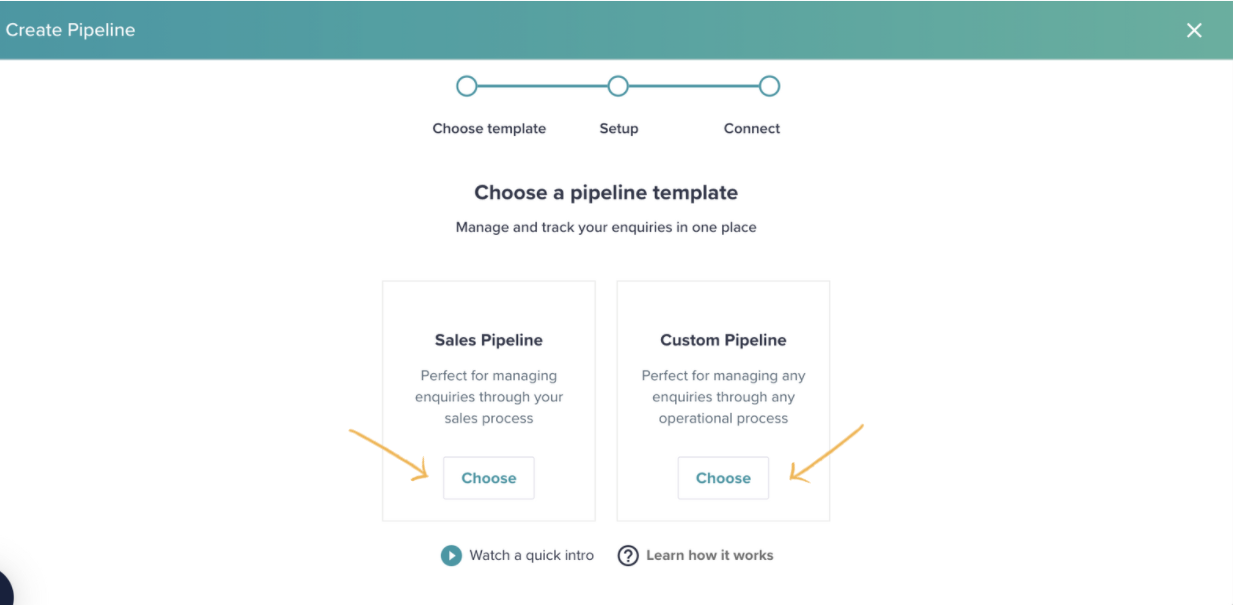
Step 2. On the pop-up, choose a pipeline template. There are 2 options:
Sales Pipeline
Perfect for managing enquiries through your sales process.
Example use case: Dealing with your new sales enquiries
Custom Pipeline
Perfect for managing any enquiries through any operation process
Example use case: Dealing with enquiries once they are converted to a customer. For example, you could create stages in a pipeline once an appointment has been booked.
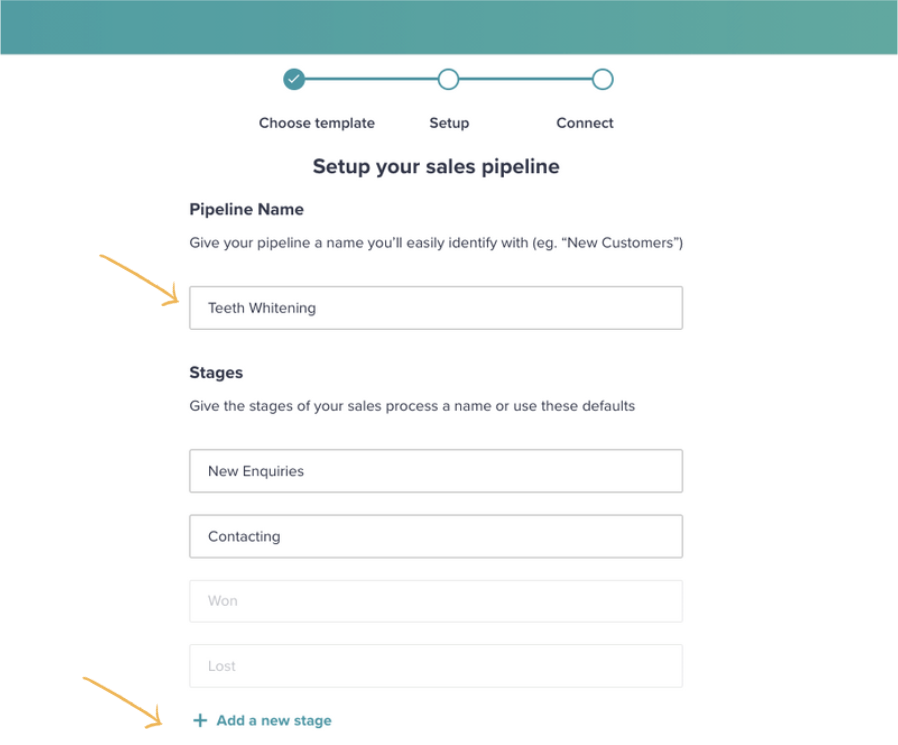
Step 3. Let's take the sales pipeline as a template for this example. Give your pipeline a name. In this example, we'll call it "Teeth Whitening" as we will send all Teeth Whitening enquiries into this pipeline from the EnquiryBot.
By default, we populate the 4 stages below. Won and Lost stage names cannot be changed as they are directly linked to reporting.
If you would like to add another stage, click + Add a new stage and type the name.
If you're not sure, no worries. You can always add the stage later.
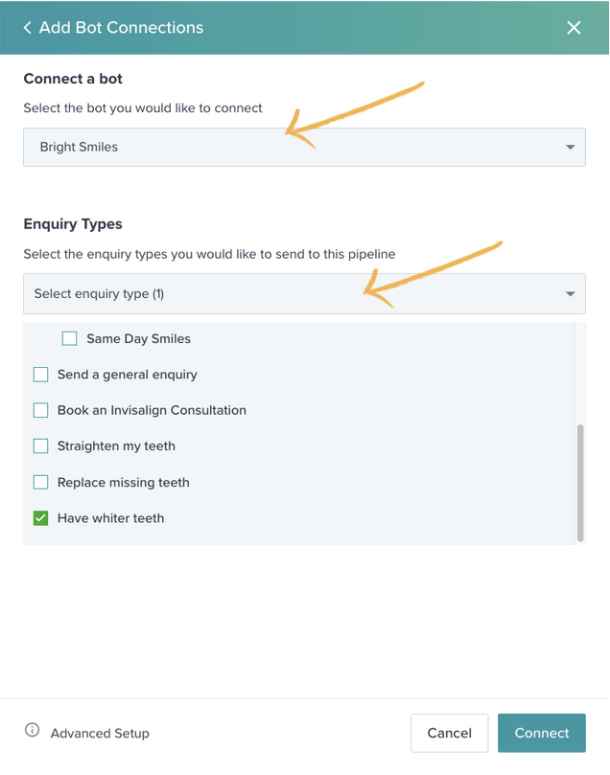
Step 4. If you would like to connect your EnquiryBot to this pipeline so for example that all "Teeth Whitening" enquiries come into this pipeline then simply select the relevant enquiry type and/or sub-enquiry type.
In this example, we will select "Have whiter teeth"
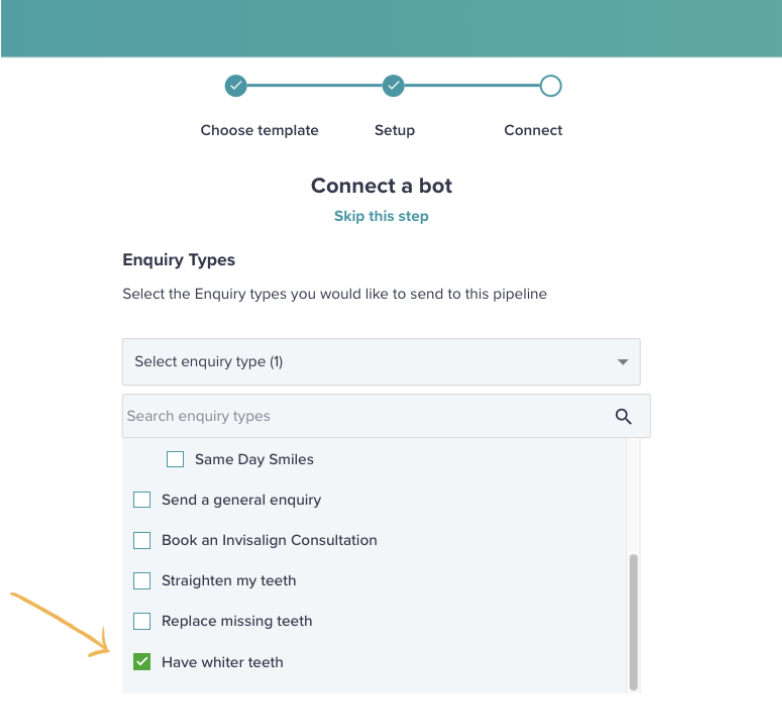
Click save and you will be brought directly to your pipeline.
If you want to skip this step you can also do that. Click skip this step. You can always connect a bot to the pipeline afterwards.

You can move old teeth whitening enquiries to this pipeline, however.
Directions on how to do that are further down in this article.
3. How to connect your EnquiryBot to a pipeline
There are 2 ways to connect your Enquirybot to a pipeline. The first way is mentioned above when setting up a pipeline.
The second way can be found once a pipeline has been created and can be found in the pipeline settings on the top right.
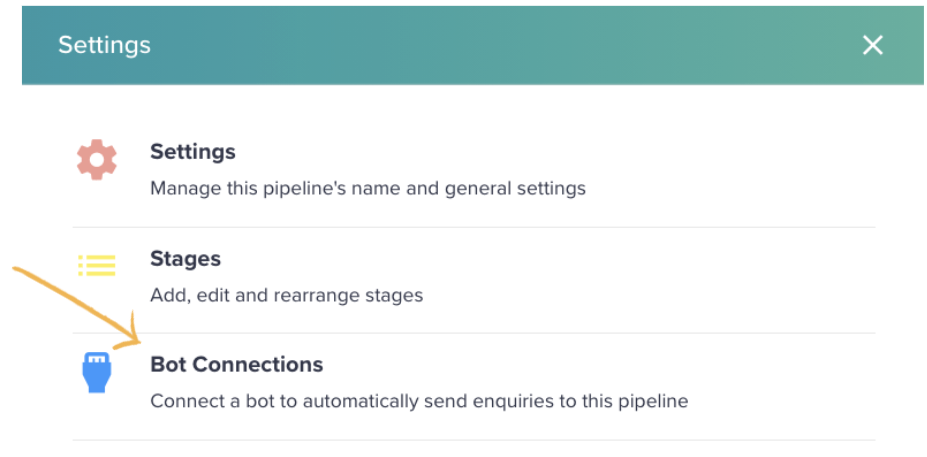
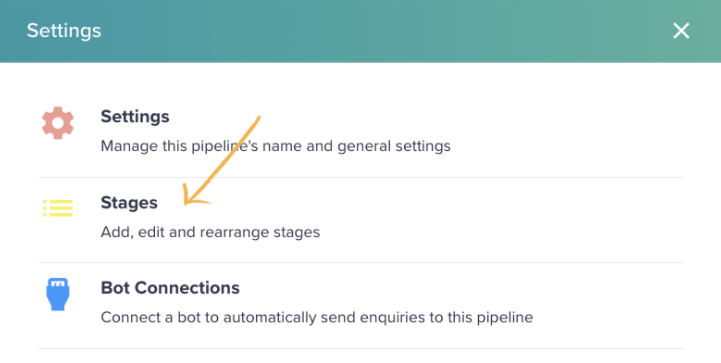
Step 1. Click the settings icon on the top right

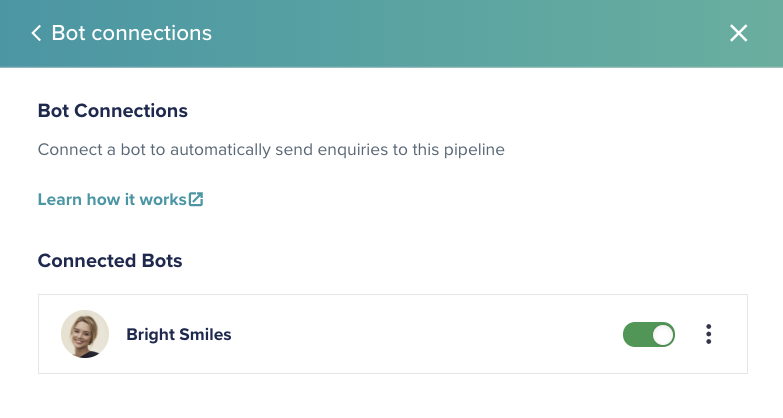
Step 2. Click on Bot Connections
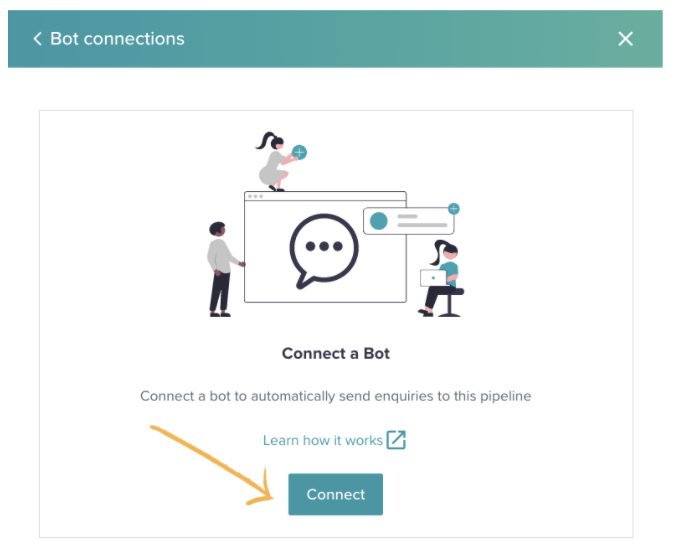
Step 3. Click on connect
Step 4. Select the Enquirybot that you want to connect and the relevant enquiry types or sub-enquiry types of the enquiries you automatically want to send into this pipeline.
Step 5. That's it, your EnquiryBot is now connected. In this example and new teeth, whitening enquiries will come into this first stage of this pipeline by default.
4. Filtering and sorting enquiries on pipelines
A key feature of the EnquiryBot platform is that you can easily find and see the enquiries that are relevant to you.
Our simple filter and sort features allow you to do this with ease and to know what filters and sort are applied at any given time.
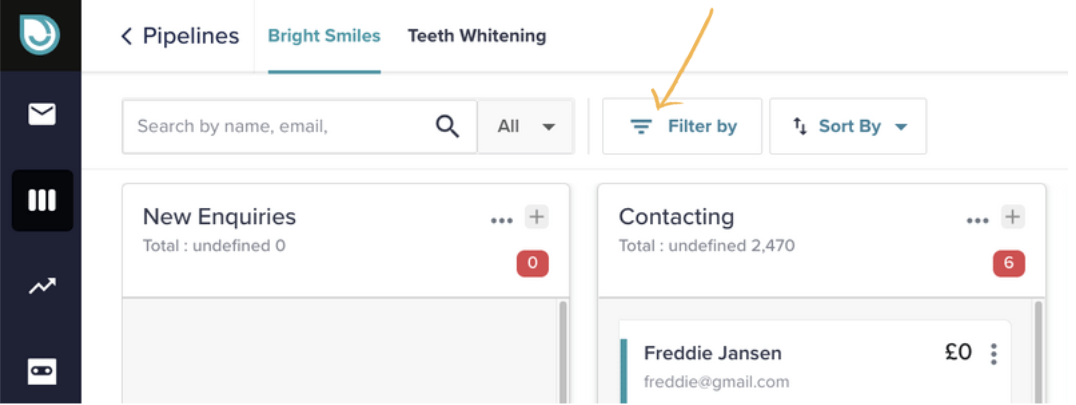
Filtering Enquiries
Step 1 - Click the filter by button
Step 2 - A pop-out will show from the right-hand side of the screen. On the pop-out, you can filter by the following things.
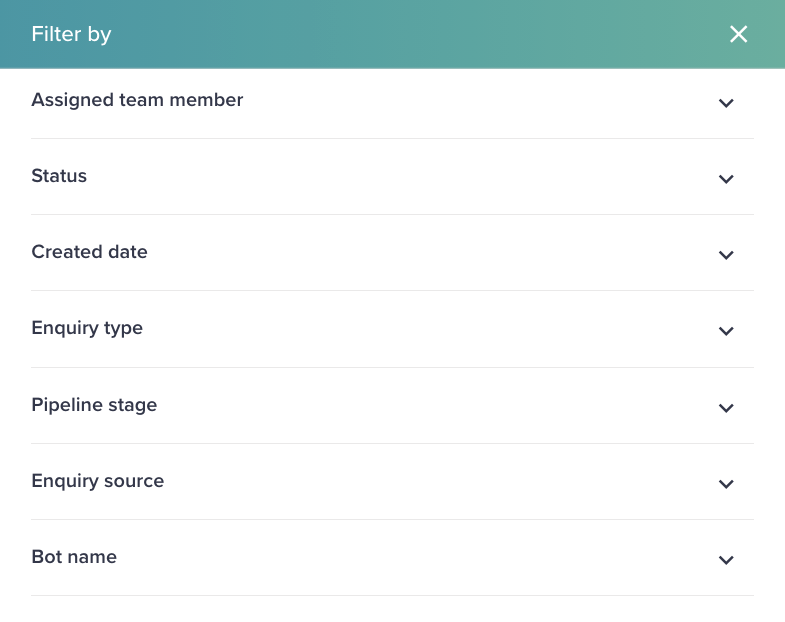
Click on the relevant filter you would like to apply and click apply.
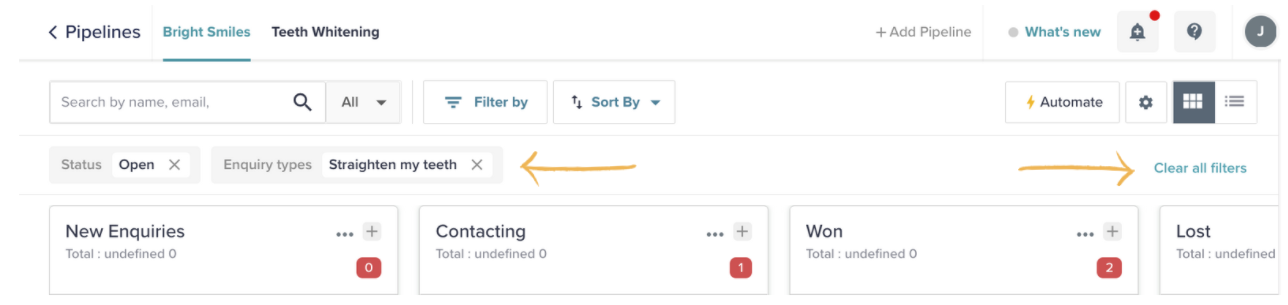
Once applied the filters will show on the screen, they will remain in place unless and until you manually remove them by clicking the "X" individually or clicking clear all filters on the right-hand side.
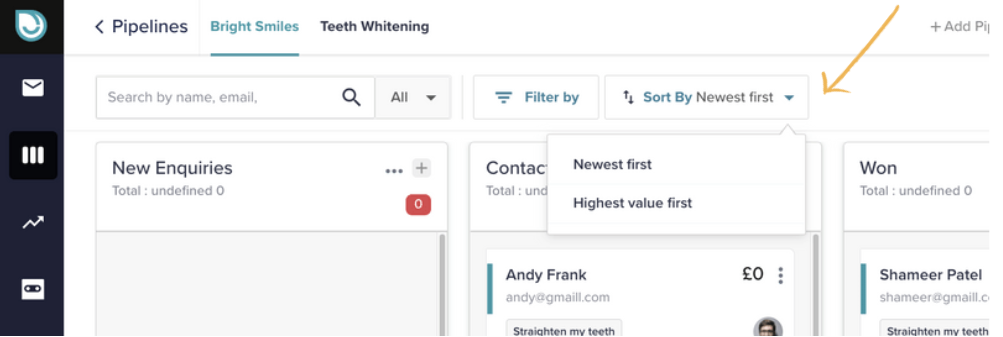
Sorting Enquiries
Step 1. By default " Newest first" will be applied. Simply click the "Sort by" box and the drop-down will show. Select the relevant sort by option. This sort by option will remain in place unless and until you change it.
Newest first - will show the newest enquiries first in order in each stage. This is based on the date they were created in the system or came in from your enquirybot.
Highest value first - will show the enquiries with the highest value first in order in each stage
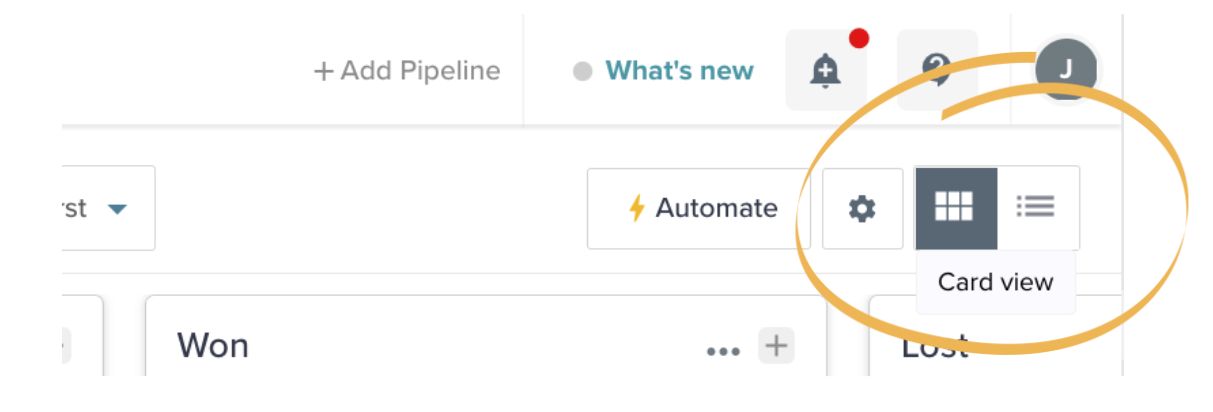
5. Pipeline Views
To give you ultimate control of your enquiries we offer 2 views.
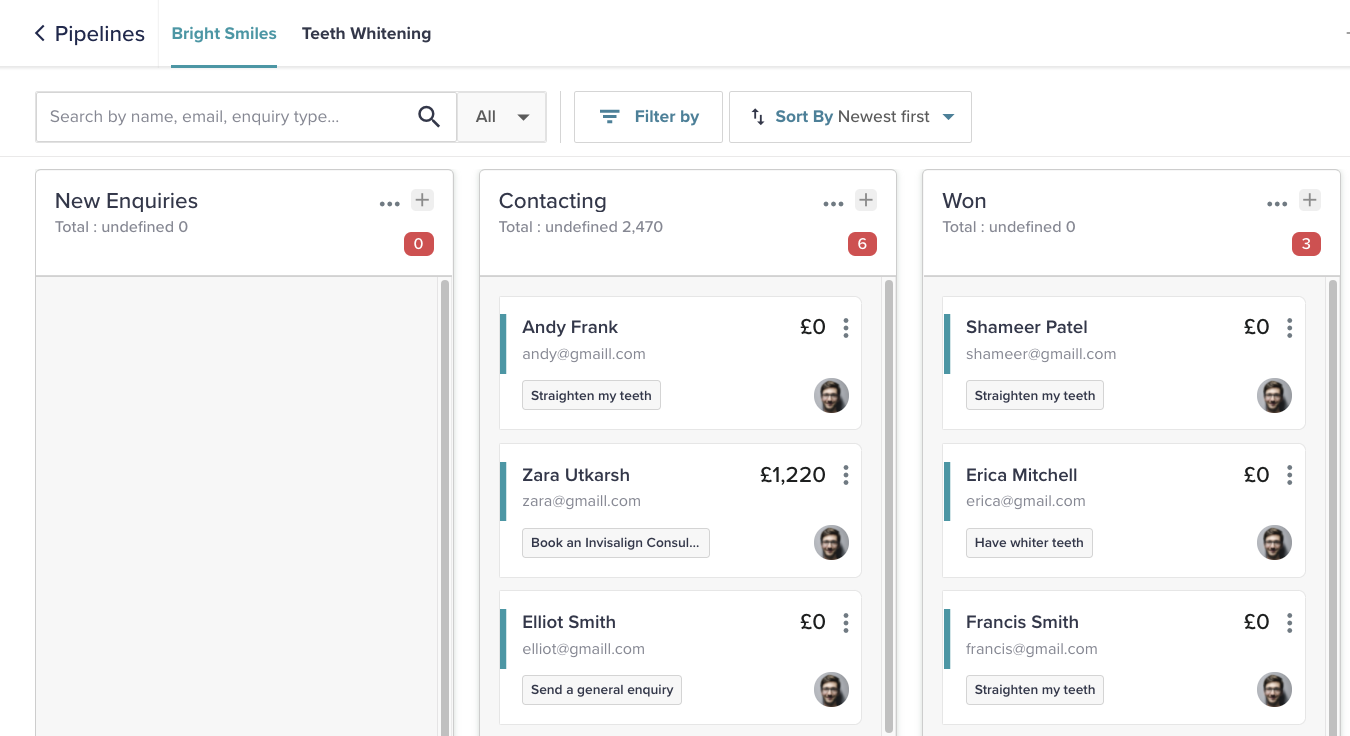
Card View
The card view shows the enquiries in a card format
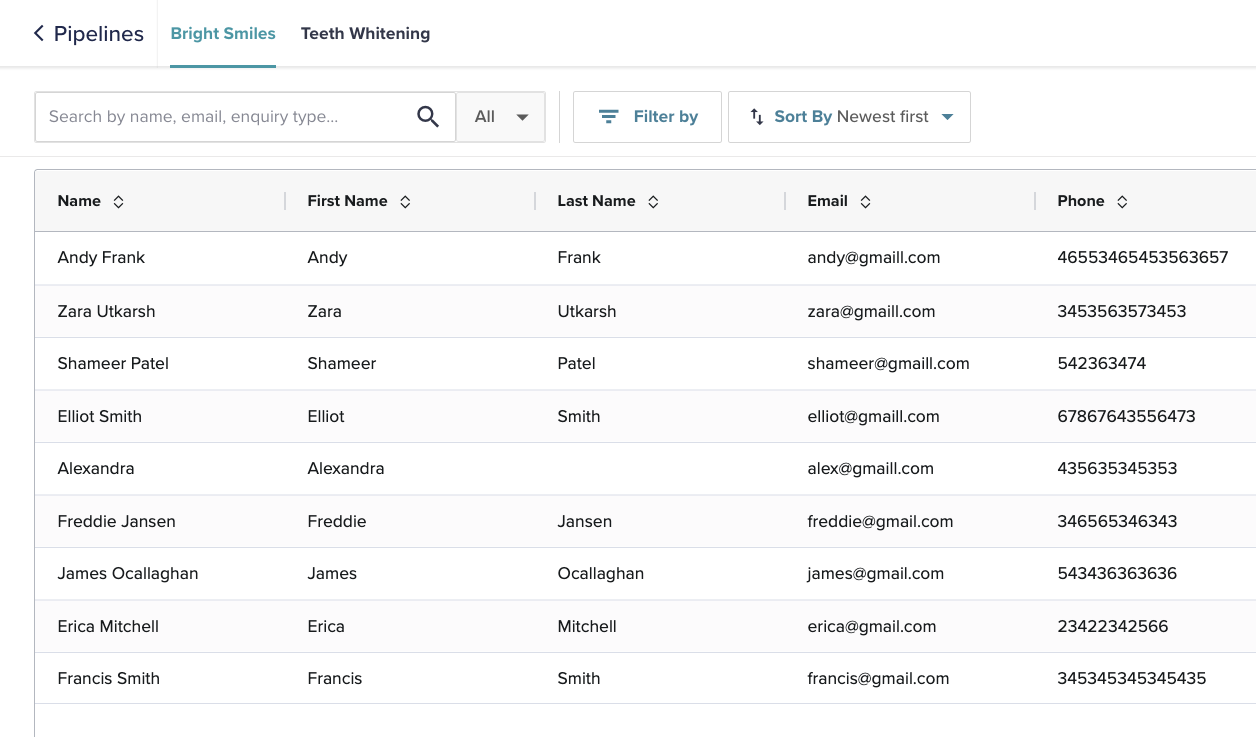
List view
The list view shows the enquiries in a list format. This view is ideal if you want to see some further information that the card view doesn't show and will allow you to easily drill down on your enquiries and export them to an excel sheet.
To toggle between these views click the relevant button on the top right-hand side of your pipeline.
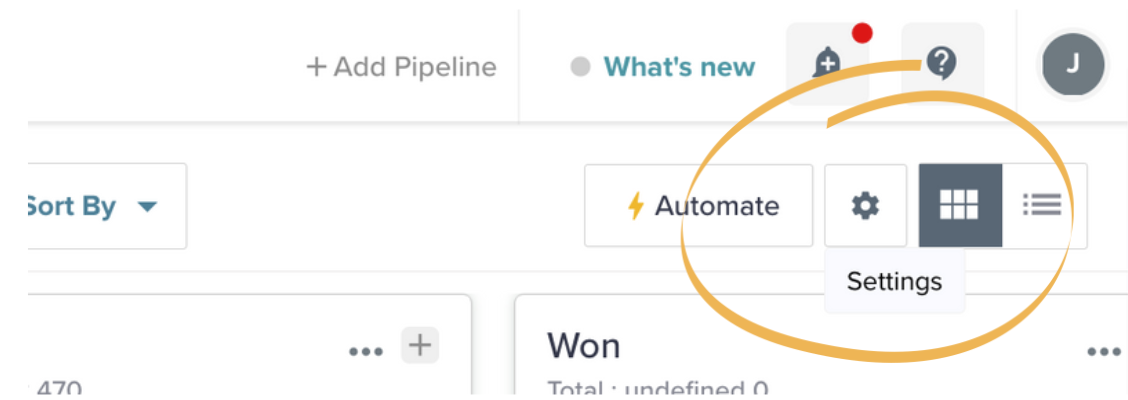
6. Pipeline settings
To access your pipeline settings click on the settings icon on the top right
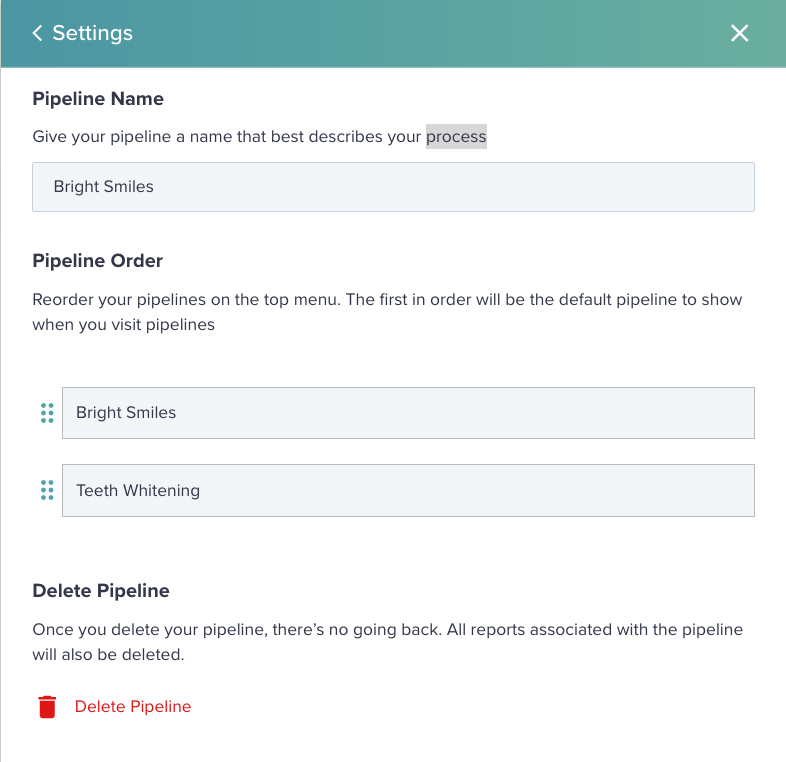
The first section, "Pipeline Settings"
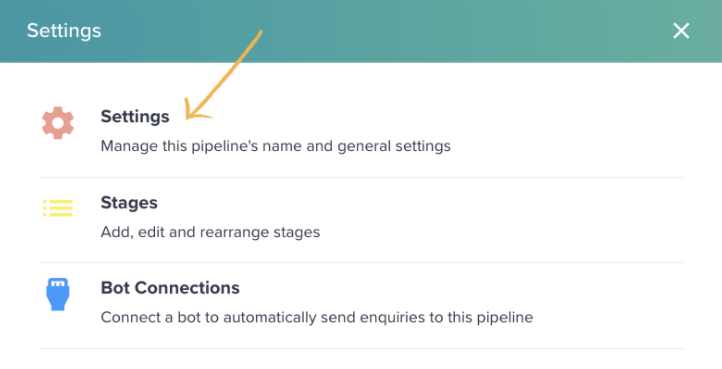
From here you can do change 3 settings:
Pipeline Name - Change the name of the pipeline itself.
Pipeline Order - Change the order in which the pipeline appear across the top menu
Delete Pipeline - Delete the pipeline completely. If there are enquiries in the pipeline you will be asked to move them to a different pipeline before deleting them.
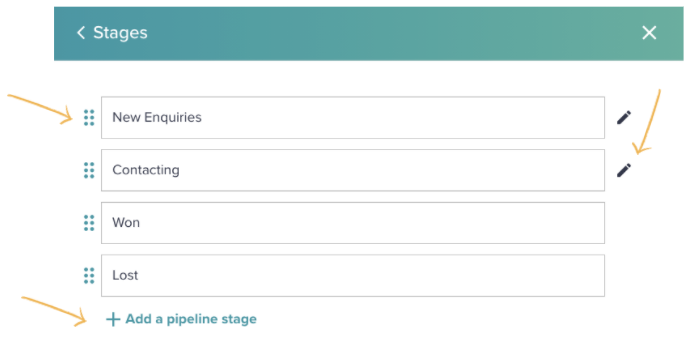
The second section, Stages
From here you reorder, add or change the name of your pipeline stages.
To reorder the stages, you can drag and drop the stage in the order you want.
To edit the name, click the edit icon. Please note if it is a sales pipeline you cannot edit the name of won or lost stages as they are directly tied to reporting.
To add a new stage, simply click + Add a pipeline stage and type in the name of the stage.
7. Moving enquiries between pipelines & multi selecting
A great feature of EnquiryBot is the ability to move enquiries between pipelines. This can be done through our automation feature (more on that here) or manually.
Here we will show you how to manually move enquiries from one pipeline to the next and to multi-select enquiries in bulk to assign, move or archive.
Move enquiries between pipelines
Moving a single enquiry to another pipeline
Step 1. On the right-hand corner of the enquiry card click on the three dots and select move this enquiry from the drop-down menu.
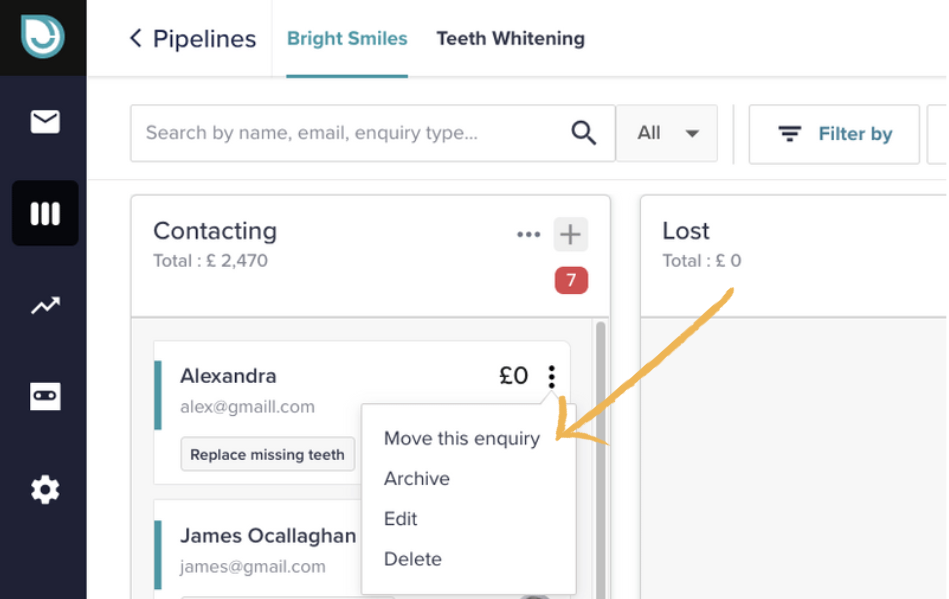
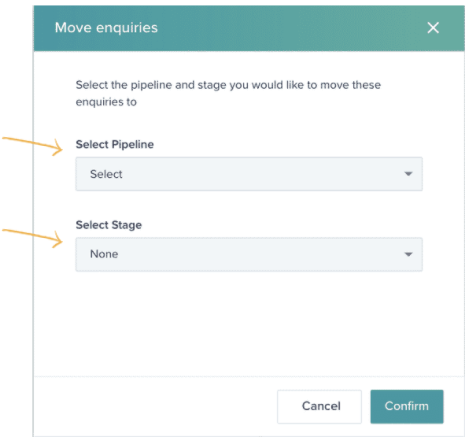
Step 2. On the pop up select the pipeline you would like to move the enquiry to and the relevant stage a press confirm. That's it, the enquiry will now be sent to the selected pipeline and stage!
Multi-select enquiries to (move, assign and archive)
If you want to move, assign or archive more than one enquiry at a time then this is a very useful feature for you.
Step 1. On the stage heading, click the 3 dots. On the drop-down click "Multiple Selection"

Step 2. The enquiry cards will enter multi-select mode. Select the cards you want by clicking on the bottom right or on the top left click the tickbox with the (2) count after it to select all cards.
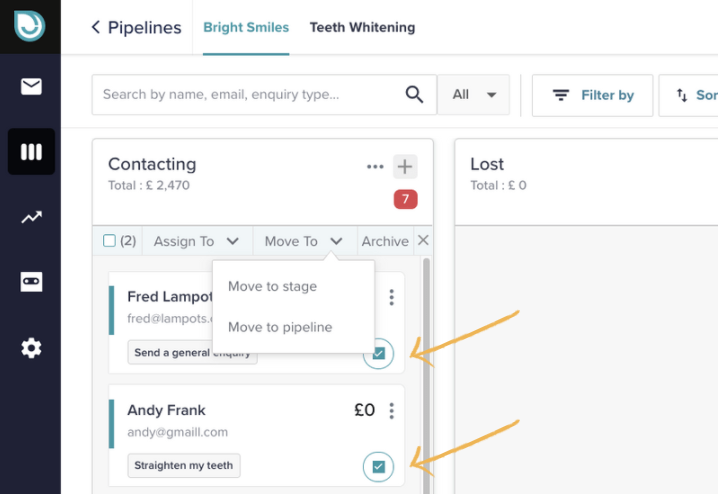
Step 3. Select what you would like to do. There are three options.
Assign to - you can assign all enquiries to a team member
Move to - you can move all enquiries to a stage in the pipeline or to another pipeline
Archive - you can archive all selected enquiries
8. Manually adding an enquiry to your pipeline
Enquiries can be added to a pipeline in 3 ways.
They are automatically added to the pipeline from your EnquiryBot
They are moved to a pipeline by a team member from another pipeline
They are manually added in.
To manually add an enquiry follow these simple steps:
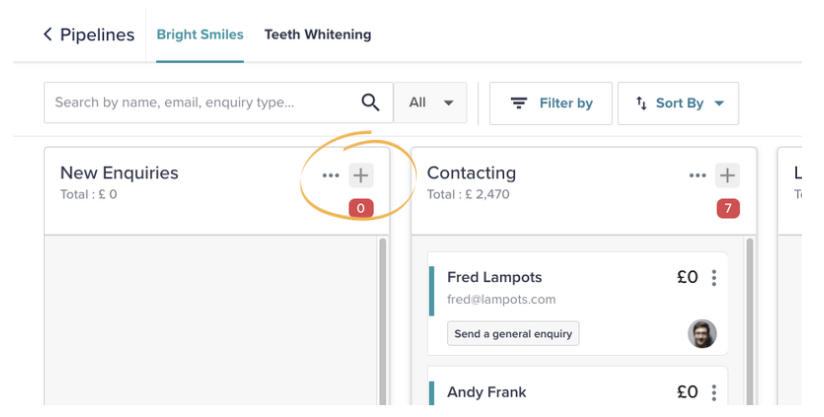
Step 1. Click the + icon on the top right-hand corner of the stage you would like to add the enquiry into.
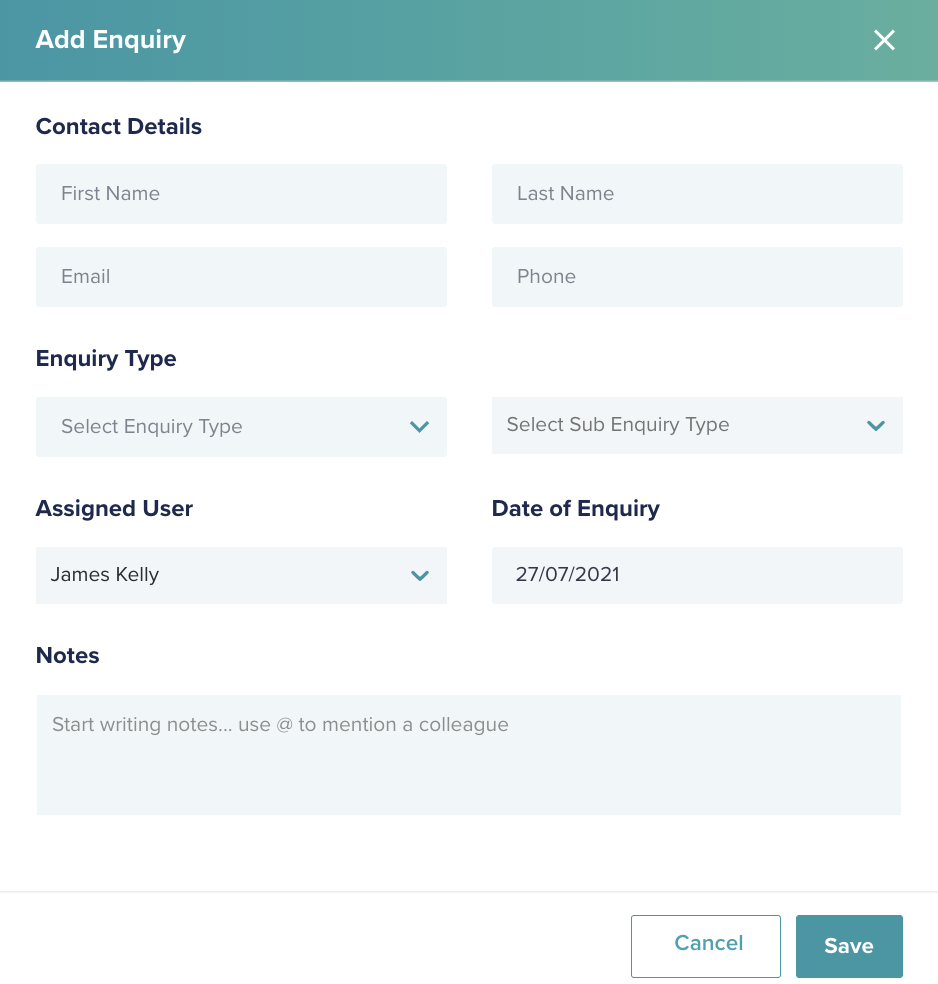
Step 2. Fill in the details on the pop up selecting the relevant enquiry type and sub enquiry type. You can also add a note when adding which will be added to the enquiry card. Click save and the enquiry will be added.
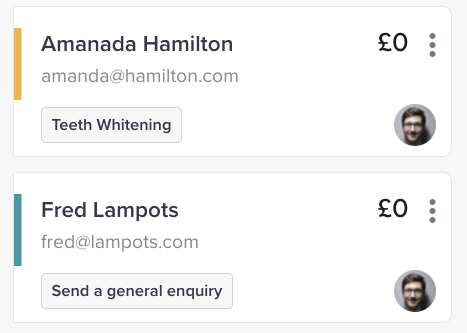
Manually added enquiries will have an orange line on the left side. Enquiries that have come in from an EnquiryBot will have a teal line next to them.
9. Pipeline Automation
Doing the same thing over and over again can get repetitive and frustrating.
That's why we have developed our Pipeline Automation Feature! 
With this feature, you can automate a range of actions, updates and emails to save yourself time and to make sure your enquiries are always dealt with in a consistent and professional manner.
To read the full article on this feature click here