
Your EnquiryBot has been designed to collect the most relevant information from your website visitors to deliver a qualified enquiry to your inbox.
But sometimes throughout your follow up or sales process you need to collect and add more information to the enquiry.
That's what extra info fields are. They are fields that you can input extra info about that enquiry into.
In this article we'll go through:
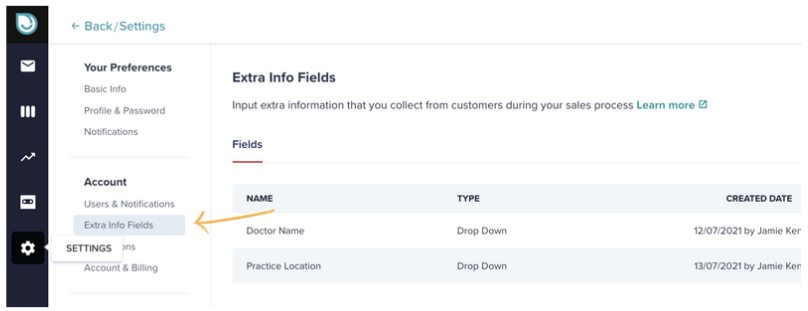
Step 1. Go to your account settings on the left-hand menu and select Extra Info Fields
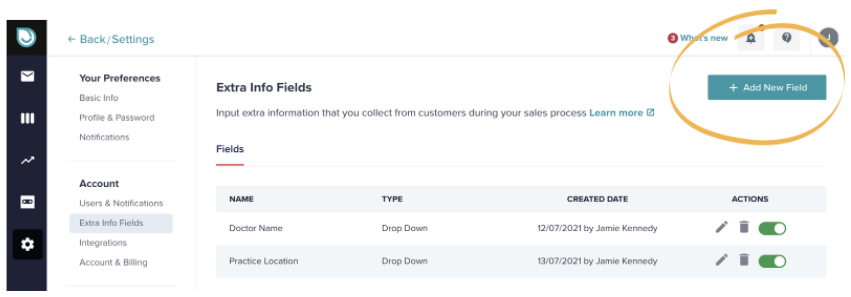
Step 2. On the top right click the Add New Field button
Step 3. Add the fields details and setup visibility:
Field name - Add the name of the field, for example, "Appointment Date". It could also be, for example, Office location. Anything that will help you identify it.
Description - This field is optional but is there if you would like to add some further details or directions. This will show as a tooltip on the field name when added.
Field Type - We have 5 field types to choose from. Date, dropdown, text, number & tickbox
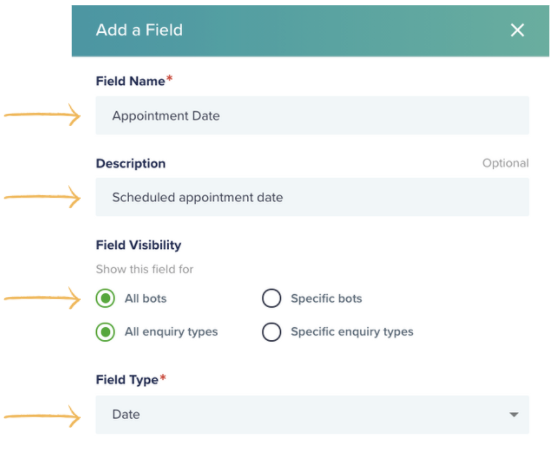
Field Visibility - This setting controls when you want to show this field. You can show it for all bots or specific bots if you have multiple on your account.
You can also choose to only show this field for specific types of enquiries. This is really useful if you have specific info you need to fill in for specific types of enquiries.
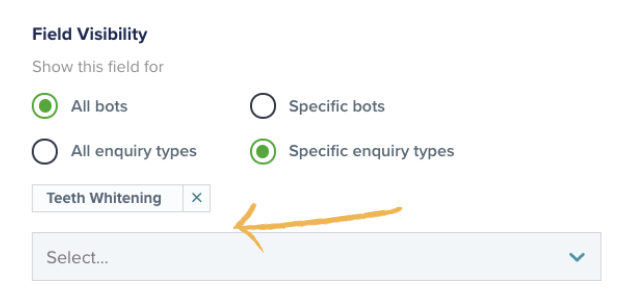
In this case, you just need to select the enquiry types you would like to show this specific field for. It will only show for that enquiry type when you open the extra info field tab on the enquiry itself.
Step 4. You can now click Save or Save and add another.
On your enquiry cards
Once added your extra info fields are on the Extra info tab when you open up an enquiry either in the inbox or in a pipeline.
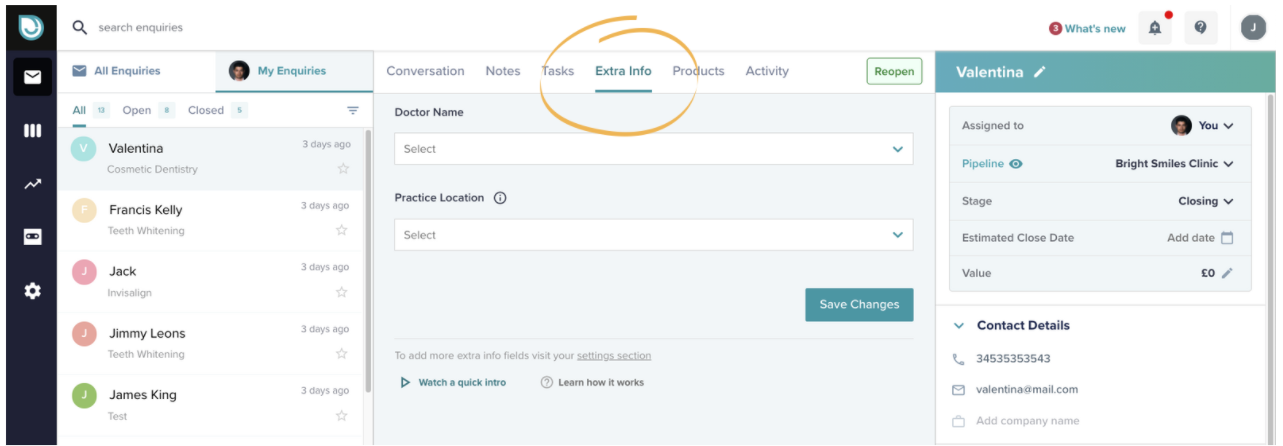
To populate the fields simply click and fill them in or select the relevant option and click save changes.
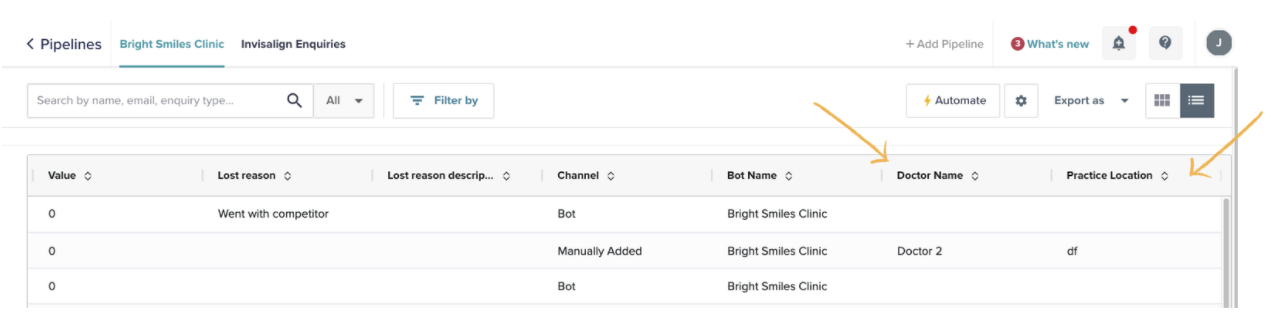
In the list view on your pipeline
Any extra info field you have associated with an enquiry in that pipeline will show here on the list view.
Example 1 - Sarah works for a hotel and wedding venue.
Sarah's EnquiryBot captures all the relevant information she needs to qualify the enquiry. The couple that enquired booked in a show round through the bot.
When Sarah showed them around the venue in person she asked them a number of other questions like the style and theme of wedding they were looking for, the type of food they wanted & the budget they had in mind.
Sarah had extra info fields setup for all these questions and once she finished her meeting she filled them in on the enquiry on EnquiryBot to keep it all in one place.
